
Häufig gestellte Fragen
Open the app settings and select the Home Theater menu.
There you will find the "Play shows automatically" option. Turn off the switch to disable the automatic playback of previews and shows.
Homescreen> Settings> Remote controls and devices> Home button
There you can assign the Home button again with the old function.
iOS (iPhone/iPad)
https://itunes.apple.com/de/app/tv-programm-tv-pro/id773206309?mt=8
Mac (Macs mit Apple-Chips, ab 2020)
https://itunes.apple.com/de/app/tv-programm-tv-pro/id773206309?mt=8
tvOS (Apple TV)
https://itunes.apple.com/de/app/tv-programm-tv-pro/id773206309?mt=8
Get the Gold package that’s right for you and save with Gold MAX for Mac & iOS.
iOS 17: With iOS 17, TV Pro requires full access to your calendar so that watchlist entries from the TV Pro calendar can be updated and deleted. If you see an error, please try the following:
- Open
Settings > Privacy & Security > Calendar - Tap the entry for TV Pro
- Select "Full Access"
Still not working? Then check if you have a set up calendar provider on your iPhone or iPad that supports creating additional calendars.
Supported Calendar Providers
- Local Calendars
- iCloud
Not Supported
- Google Accounts
- Posteo
Solution
- Add another calendar provider (e.g. iCloud) or
- Set up a local calendar: First deactivate your unsupported calendar in the iOS settings. Then activate "Watchlist in Calendar" in the TV Pro settings. You can then reactivate your regular calendar provider.
With the Live TV Fernsehen IP TV app, you will get an immediate discount for a period of one month with the purchase of the app. Then, you can freely decide whether you want to extend the app via subscription (same cost as Live TV IPTV Stream).
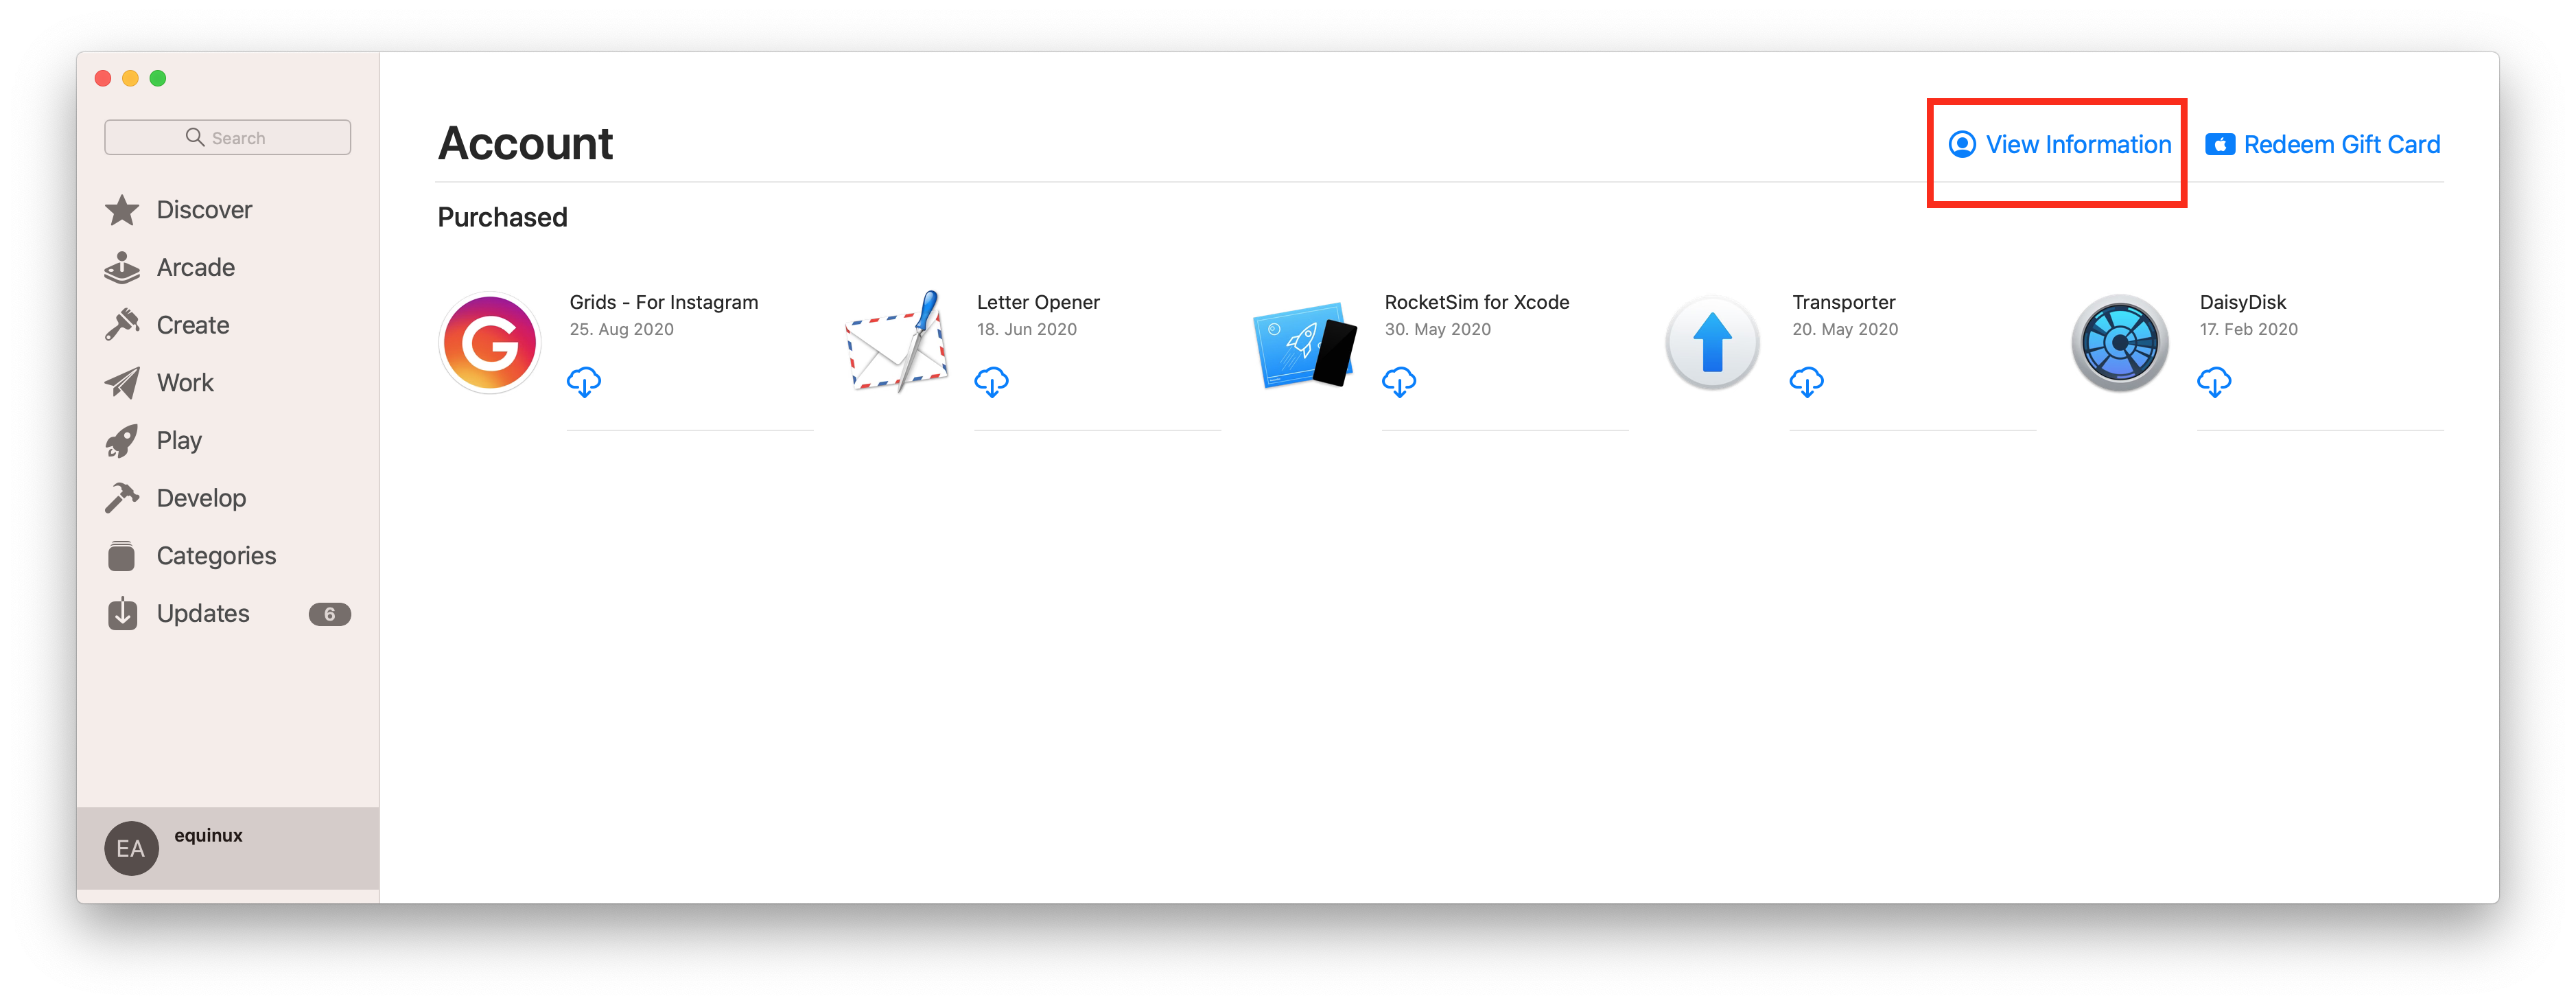 Click on "Manage" to view and edit your subscriptions on your Mac.
You can find out more information from the Apple Support website.
Click on "Manage" to view and edit your subscriptions on your Mac.
You can find out more information from the Apple Support website.
TV Pro Gold MAX is available for Mac or iOS. There are also combination packages for use on both platforms.
Do you want to become a tester? Sign up now!
On Mac you find your search stream at the top right (next to the search field).
On iPad: show the sidebar at the bottom left and go to Tips, select "Search Stream" there
On iPhone you swipe from the left edge of the screen to the right to get to the menu. Under "My TV Pro" you will find the search stream.
Wenn AirPlay in TV Pro oder Live TV nicht mehr wie gewohnt funktioniert, können folgende Schritte helfen, das Problem zu beheben:
- Geräte neu starten: Starte sowohl dein iOS-Gerät bzw. deinen Mac als auch das AirPlay-Zielgerät (z. B. Apple TV oder AirPlay-fähigen Fernseher) neu.
- Netzwerk überprüfen: Stelle sicher, dass beide Geräte mit demselben WLAN-Netzwerk verbunden sind. AirPlay funktioniert nur im gleichen Netzwerk.
- AirPlay-Verbindung testen: Probiere, ob AirPlay mit einer anderen App (z. B. der Fotos- oder YouTube-App) funktioniert. So lässt sich feststellen, ob das Problem an AirPlay allgemein oder nur in TV Pro / Live TV liegt.
- App aktualisieren: Stelle sicher, dass du die neueste Version von TV Pro bzw. Live TV installiert hast. Updates können AirPlay-Probleme beheben.
- iOS/macOS aktualisieren: Auch dein Betriebssystem sollte auf dem neuesten Stand sein, da AirPlay-Änderungen oft über Systemupdates kommen.
- Neuverbindung herstellen: Beende die App komplett und starte sie neu. Versuche dann erneut, die AirPlay-Verbindung herzustellen.
- AirPlay-Einstellungen prüfen: Überprüfe die AirPlay- und Datenschutz-Einstellungen auf deinem Gerät und deinem Apple TV.
On your hard drive they are stored here.
‣ In the Finder, choose "Go to"> "Go to Folder ..."
‣ Then type: ~/Library/Containers/de.livetv.mediathek-macos/Data/Documents/downloads/
In the next update, you can set the storage location 👍
Recently, root certificates for "Let's Encrypt" expired. Apple has decided not to update root certificates for OS X versions older than macOS 10.12. This means that when apps or Safari on your Mac access websites using Let's Encrypt root certificates, they will not load correctly.
This can also cause problems when logging in to the app.
How to fix this issue- Open Safari, go to https://equinux.github.io and download the fix
- Open the profile in System Preferences and choose "Install"
- Re-launch the app and sign in again
Use the app and its functions as you always do and tell us about errors, strange displays or also incomprehensible connections.
You can therefore help to make TV Pro an even better app.
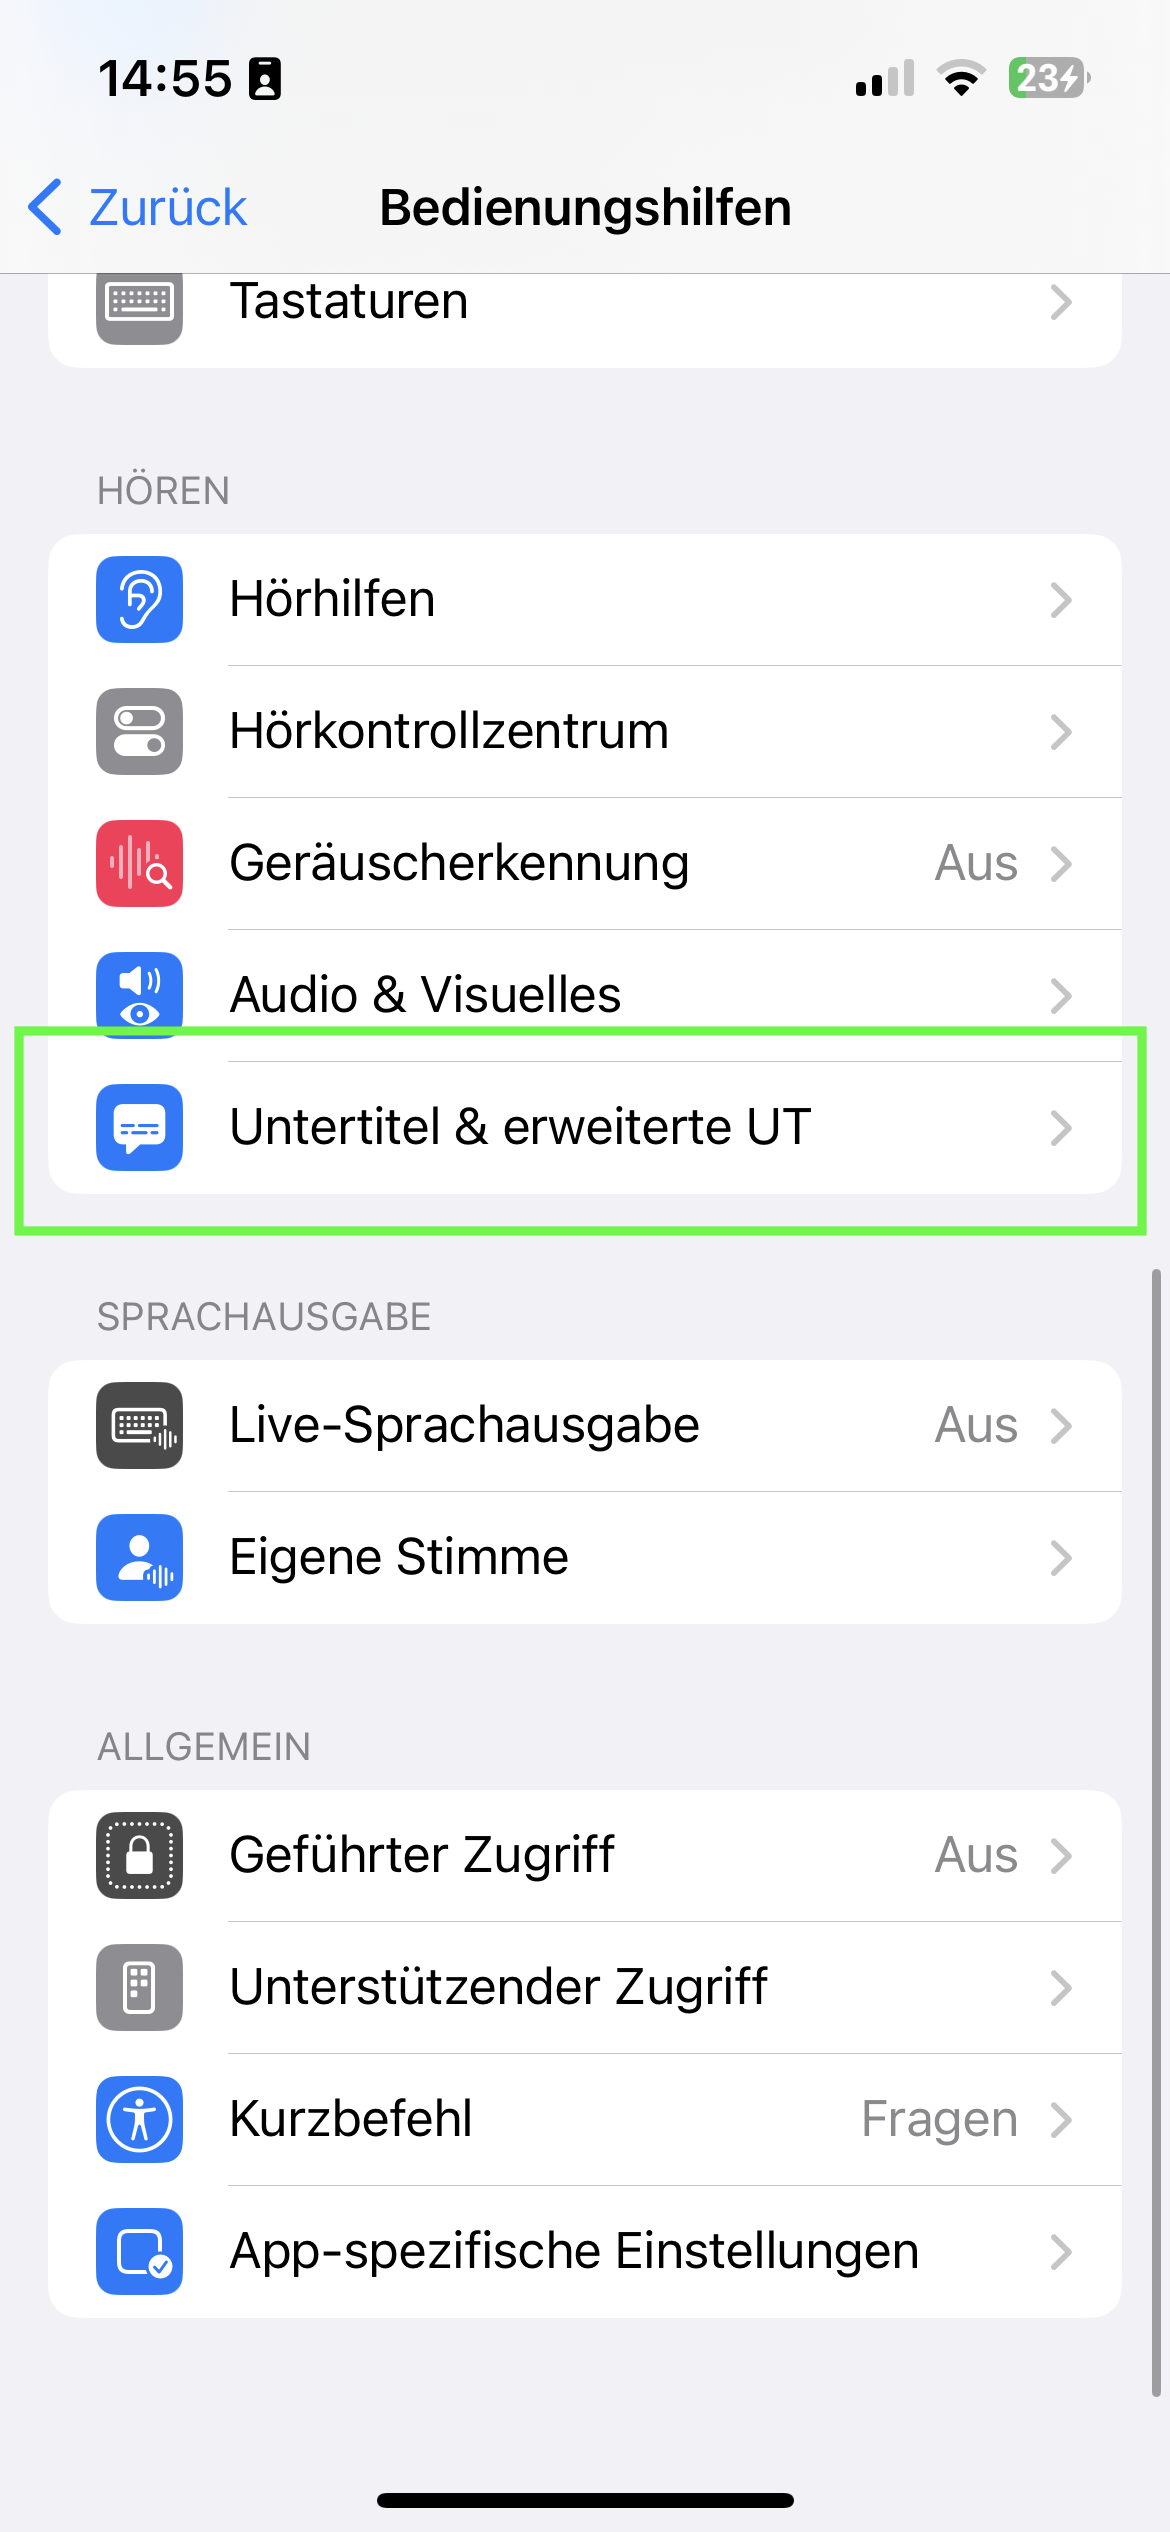
- Please open your iPhone settings (the General ones, not the TV Pro ones)
- Go to "Accessibility" and then to "Subtitles & Captions"
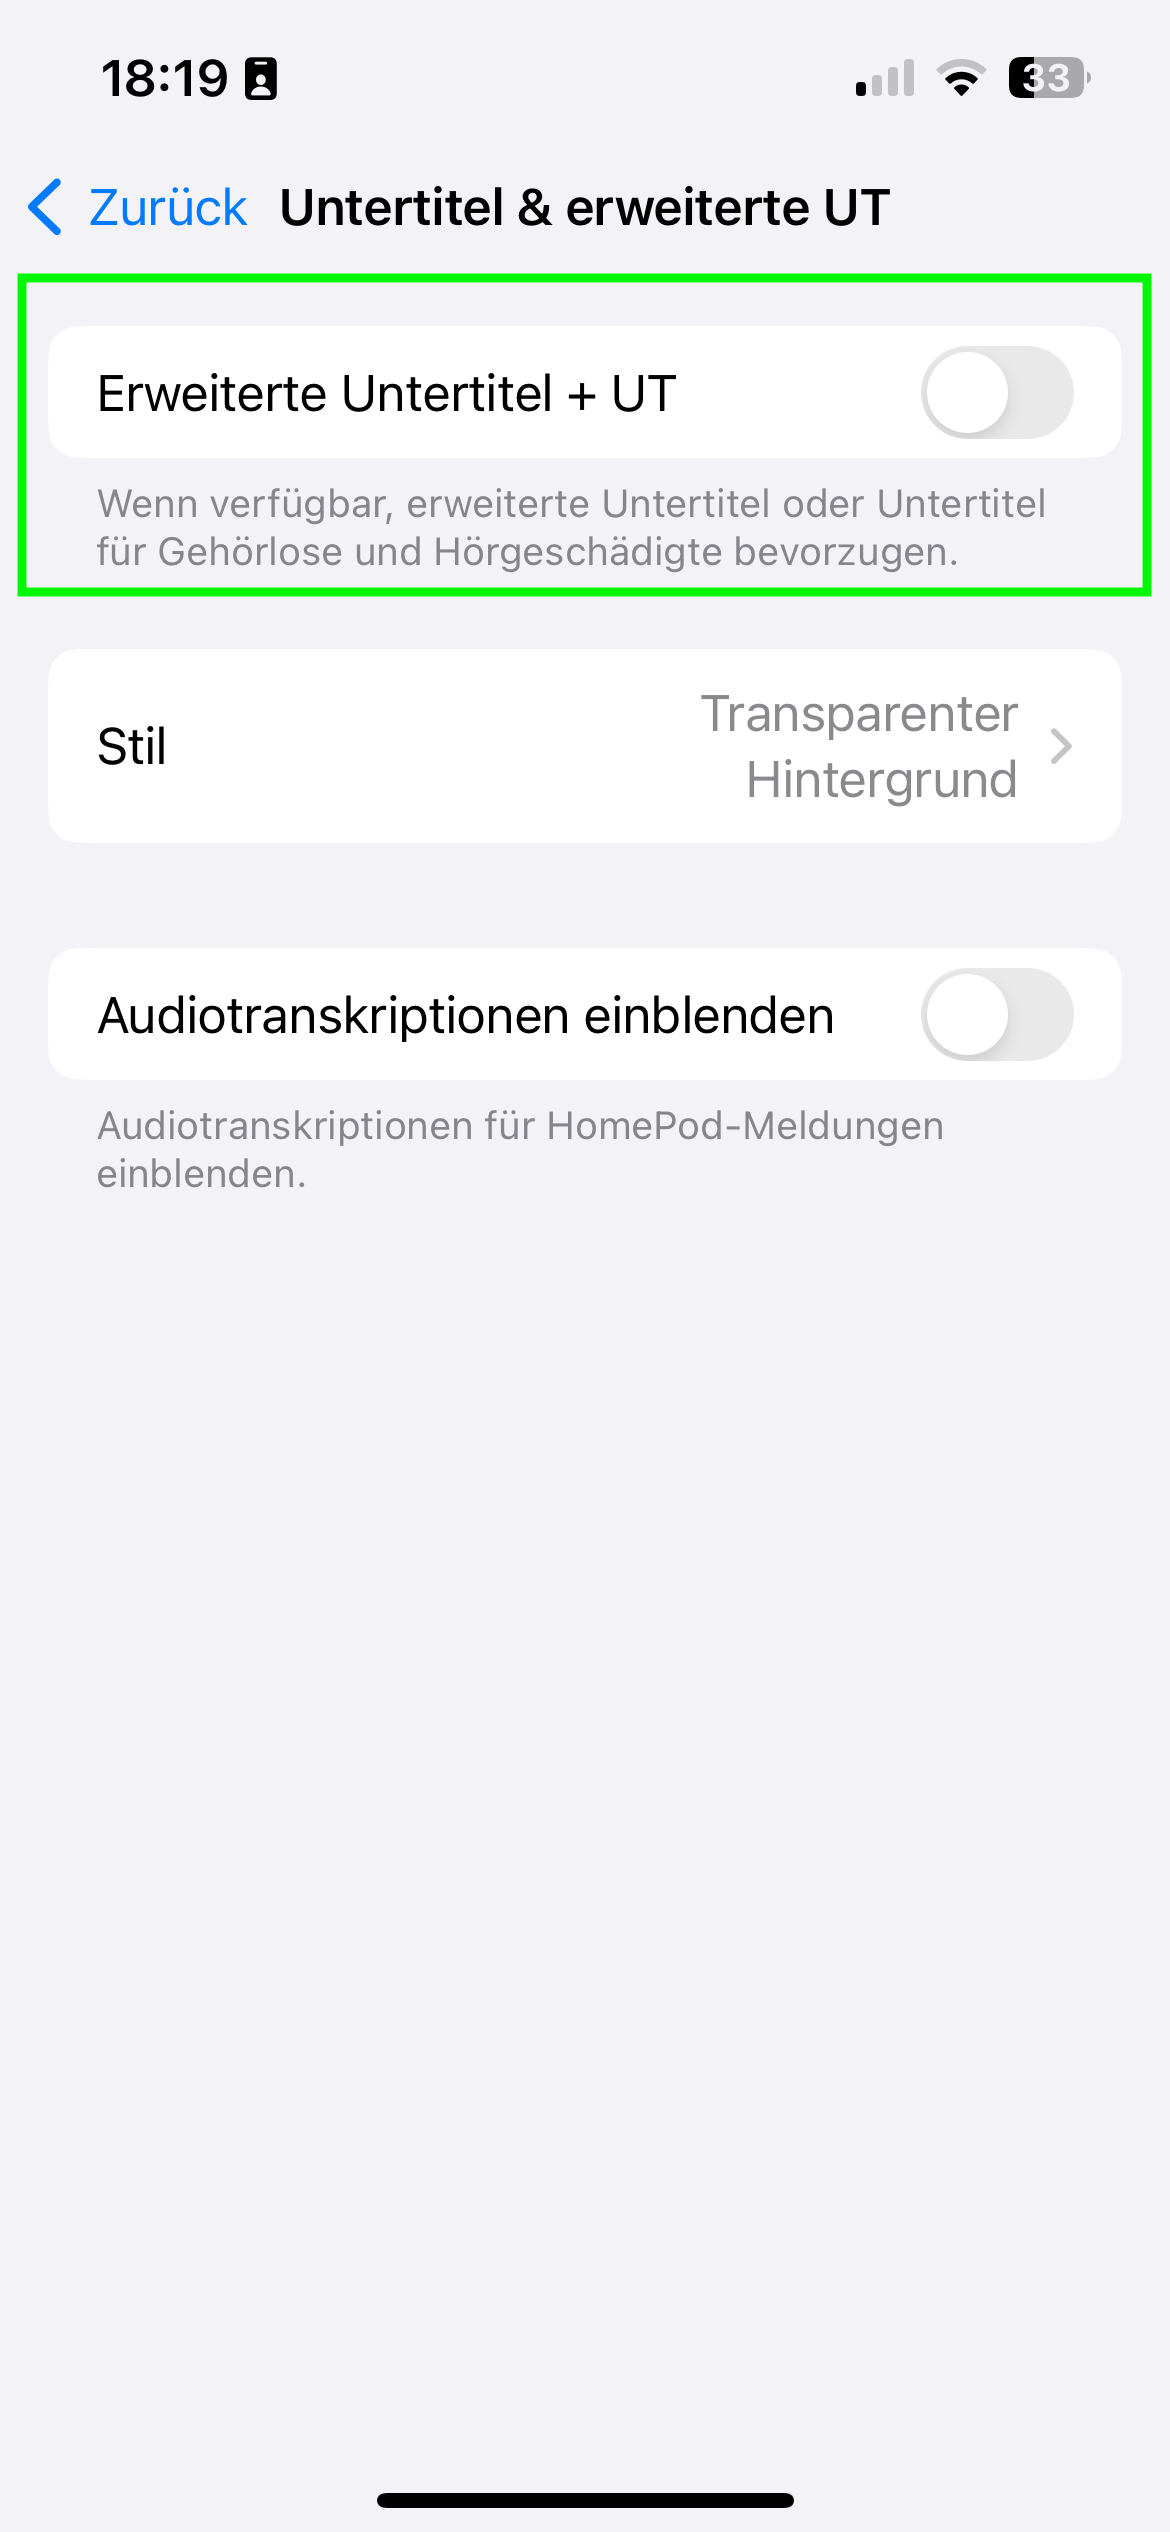
- Check that the "Advanced Subtitles + Captions" switch is NOT green. If the switch is green, subtitles will be displayed in the streams.
- If subtitles are still displayed, please turn the switch to green once, then back to gray. After that, no subtitles should be displayed anymore.
The sequence of the stations can be set via "Live TV" > "Settings" (Einstellungen). Then, under "Sender," you can use drag and drop to arrange.
You can also hide the stations that do not interest you.
 Do you want to become a tester? Sign up now!
- TV Pro
- Live TV
- TV Pro Mediathek
- Secure purchases
- Transfer purchases
- Use features like Sync etc.
TV Pro
TV Pro for iPhone / iPad Settings > Account ("Not logged in") > Login ► Watch tutorial TV Pro Classic for iPhone / iPad Gear (Settings) > TV Pro Gold > Login TV Pro for Apple TV Menu > Settings > View packages > Log in with TV Pro IDLive TV
Live TV for iPhone / iPad Store > Login or create user account Live TV for Mac Live TV > Log in with TV Pro ID ... Live TV for Apple TV Menu > Store > Log in with TV Pro IDTV Pro Mediathek
TV Pro Mediathek (also for Kids Edition) for iPhone / iPad More > Settings > TV Pro ID > Login TV Pro Mediathek for Mac TV Pro Mediathek > Log in with TV Pro ID ... TV Pro Mediathek for Apple TV Menu > Settings > View packages > Log in with TV Pro ID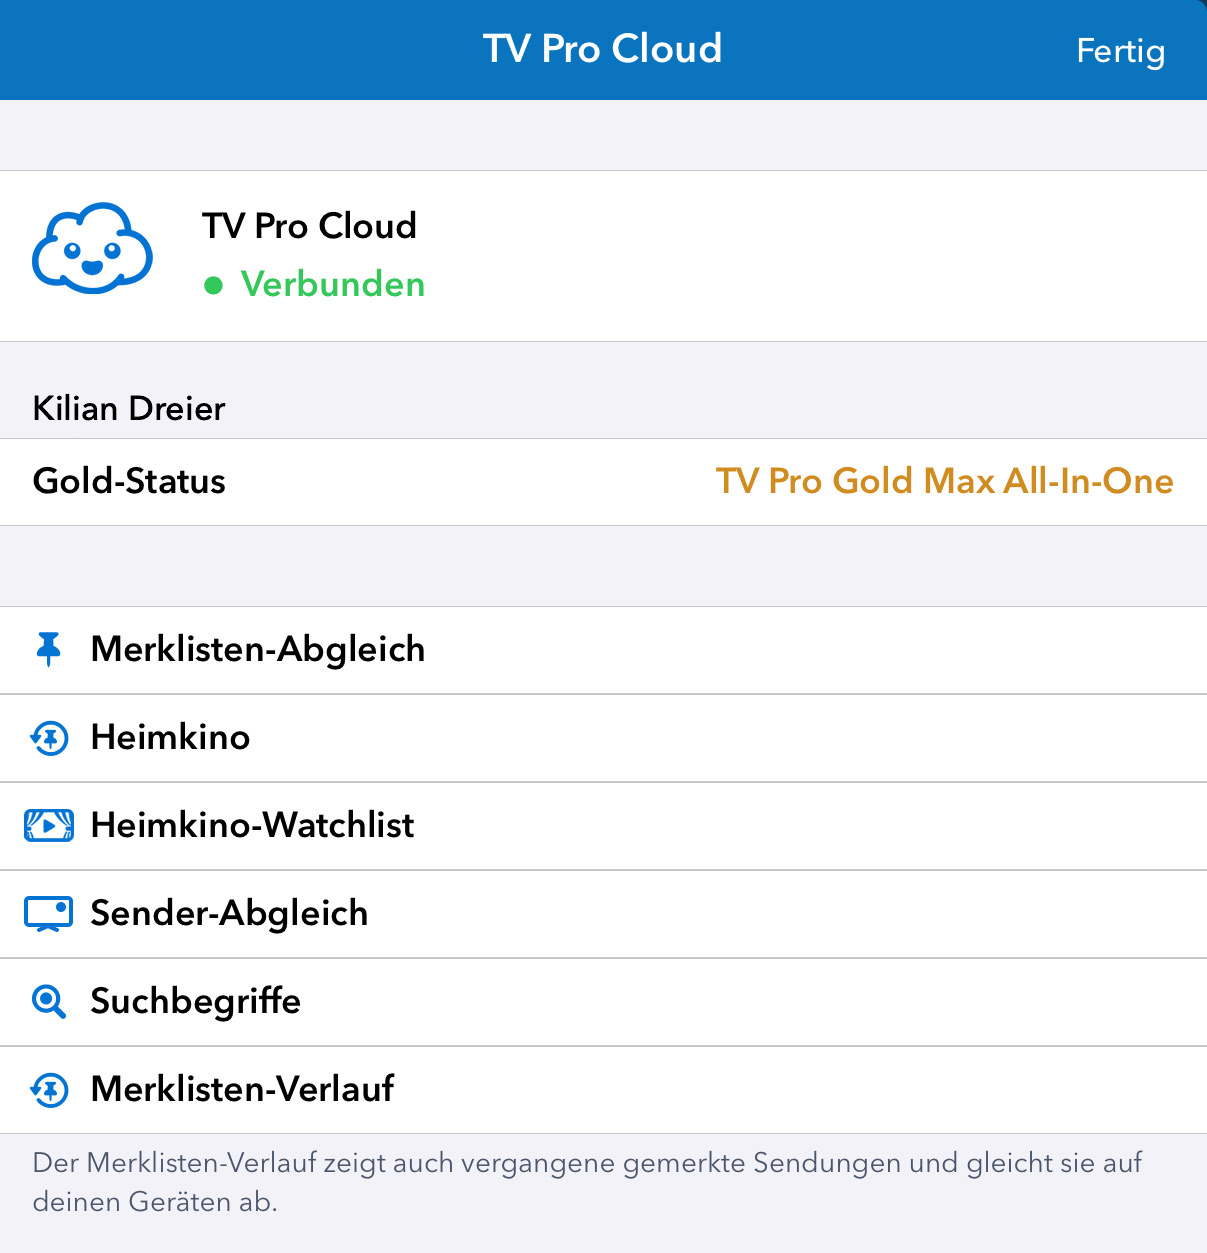
Why some channels are not available outside the country
The TV broadcasters themselves decide whether their streams are available outside the country. For this reason, we cannot make any statement about whether a specific channel can be received abroad.
How to check availability in the app
In some cases, availability can even vary from one program to another. That is why we have built in a detection feature: the badge shown next to the channel name indicates the status.
- Blue badge: Stream potentially available
- Gray badge: Stream not available
Watching from abroad with a German internet address
With the app VPN Tracker World Connect, you can connect to a German internet address from abroad in order to watch TV. This app can be tested for free for 24 hours:
https://itunes.apple.com/de/app/vpn-tracker-world-connect/id1117424189?mt=8
1. The film format is not compatible on the end device. The film may be suitable for the Apple TV but not on iPhone / iPad or vice versa.
2. You are abroad. In Germany. the film would be available. Abroad, the film may be blocked. In this case, a VPN service can help such as WorldConnect from VPN Tracker (can be tested for free):https://itunes.apple.com/de/app/vpn-tracker-world-connect/id1117424189?mt=8
3. Mediatheken cleans up the content daily. We check once a day whether the broadcasts are available and automatically clean up broadcasts that are no longer available. If the transmitter is switched off during the day, the exclamation mark can appear. On the following day, the shows are no longer in the catalog.
- This video may only be reproduced in Austria for legal reasons.
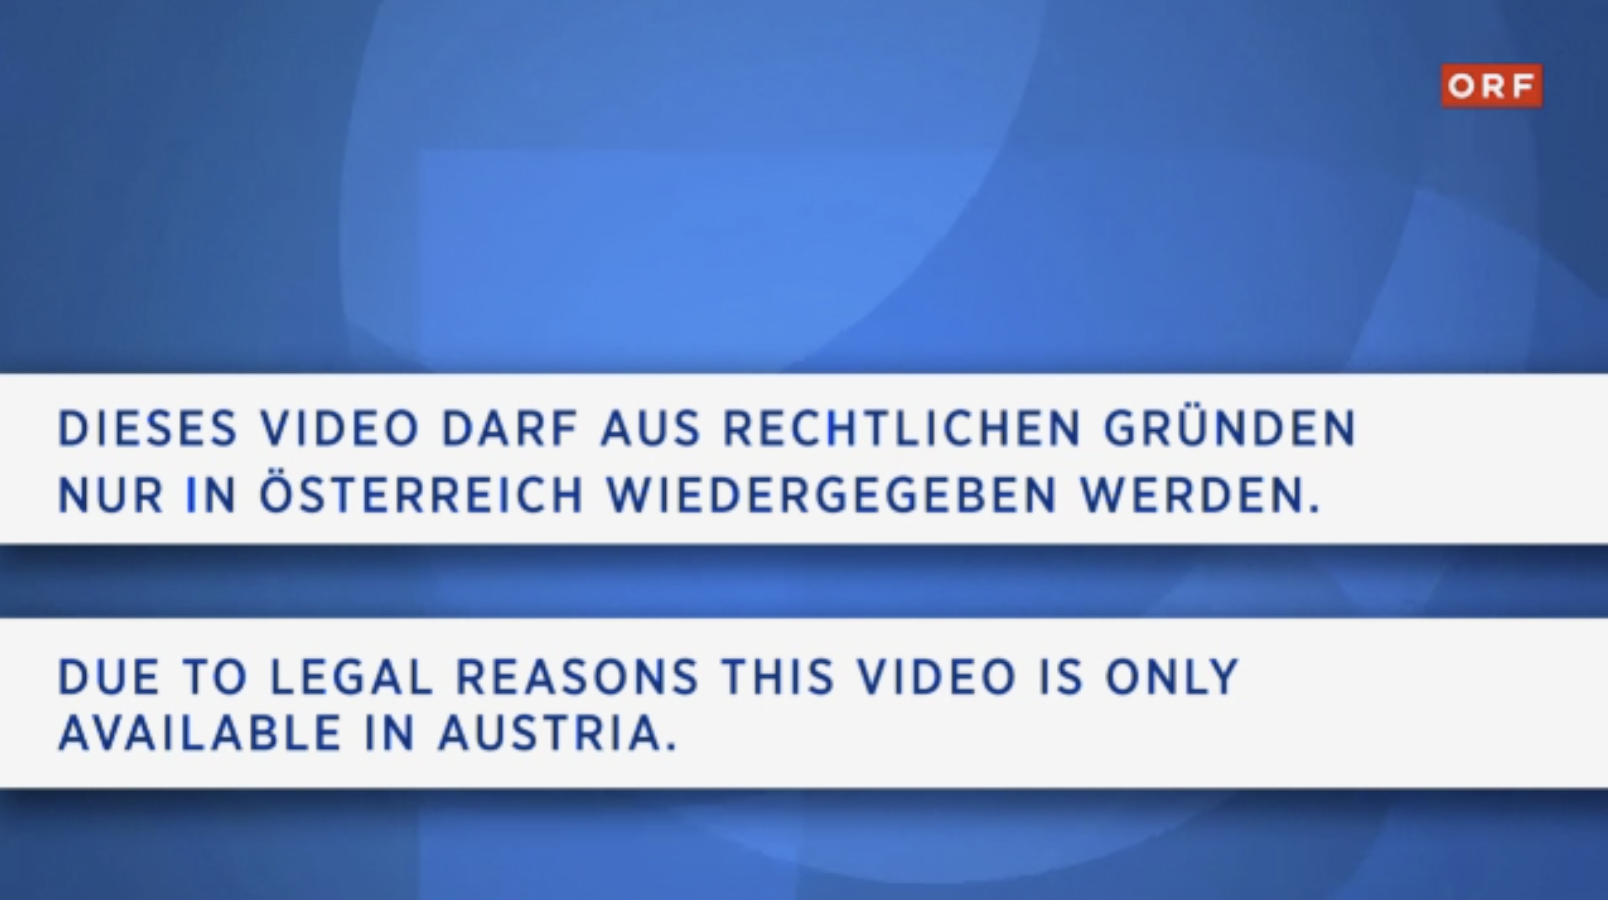
Reason: The broadcast is only broadcasted in Austria but not in other countries like Germany. - The desired live stream is currently unavailable

Reason: The broadcast is generally not broadcasted on the Internet, regardless of whether you are in Austria or not.
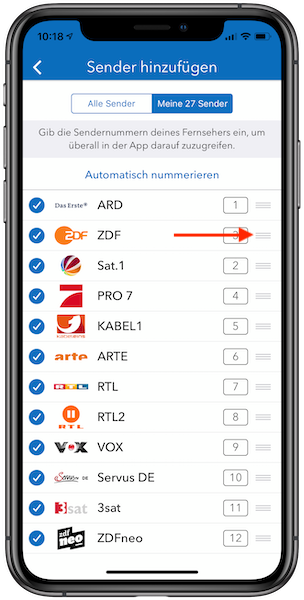
- Select TV Pro > Settings > Add channels > My channels
- Tap the handle on the right and drag the channel to the desired position
- The “Automatic numbering” function can be used to assign numbers to the channels. Alternatively, you can manually assign a number to each channel by clicking on the number field next to the channel.
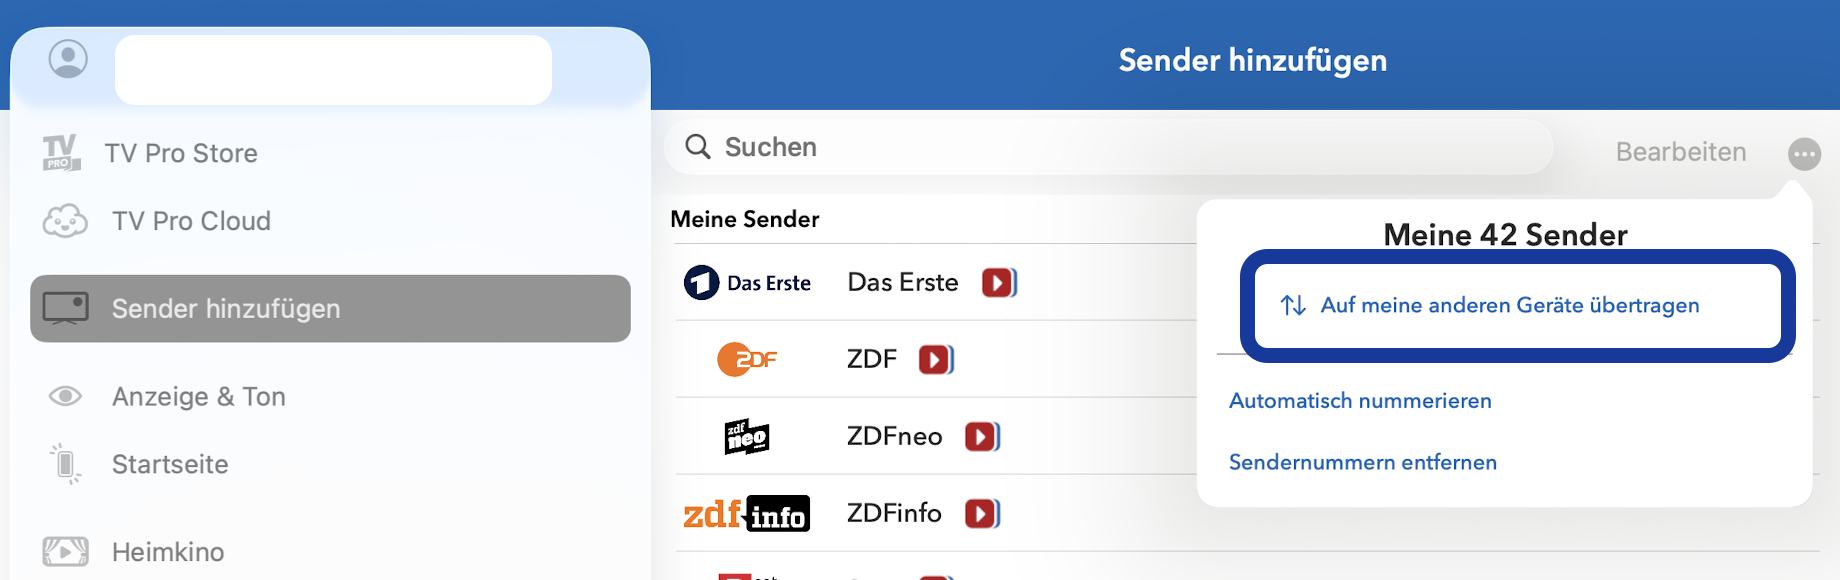
1. In the TV Pro settings, tap "Add Channels"
2. Tap "..." at the very top there.
3. The Sync view opens, where you tap Save. Now your channel list is saved from this device to the TV Pro Cloud.
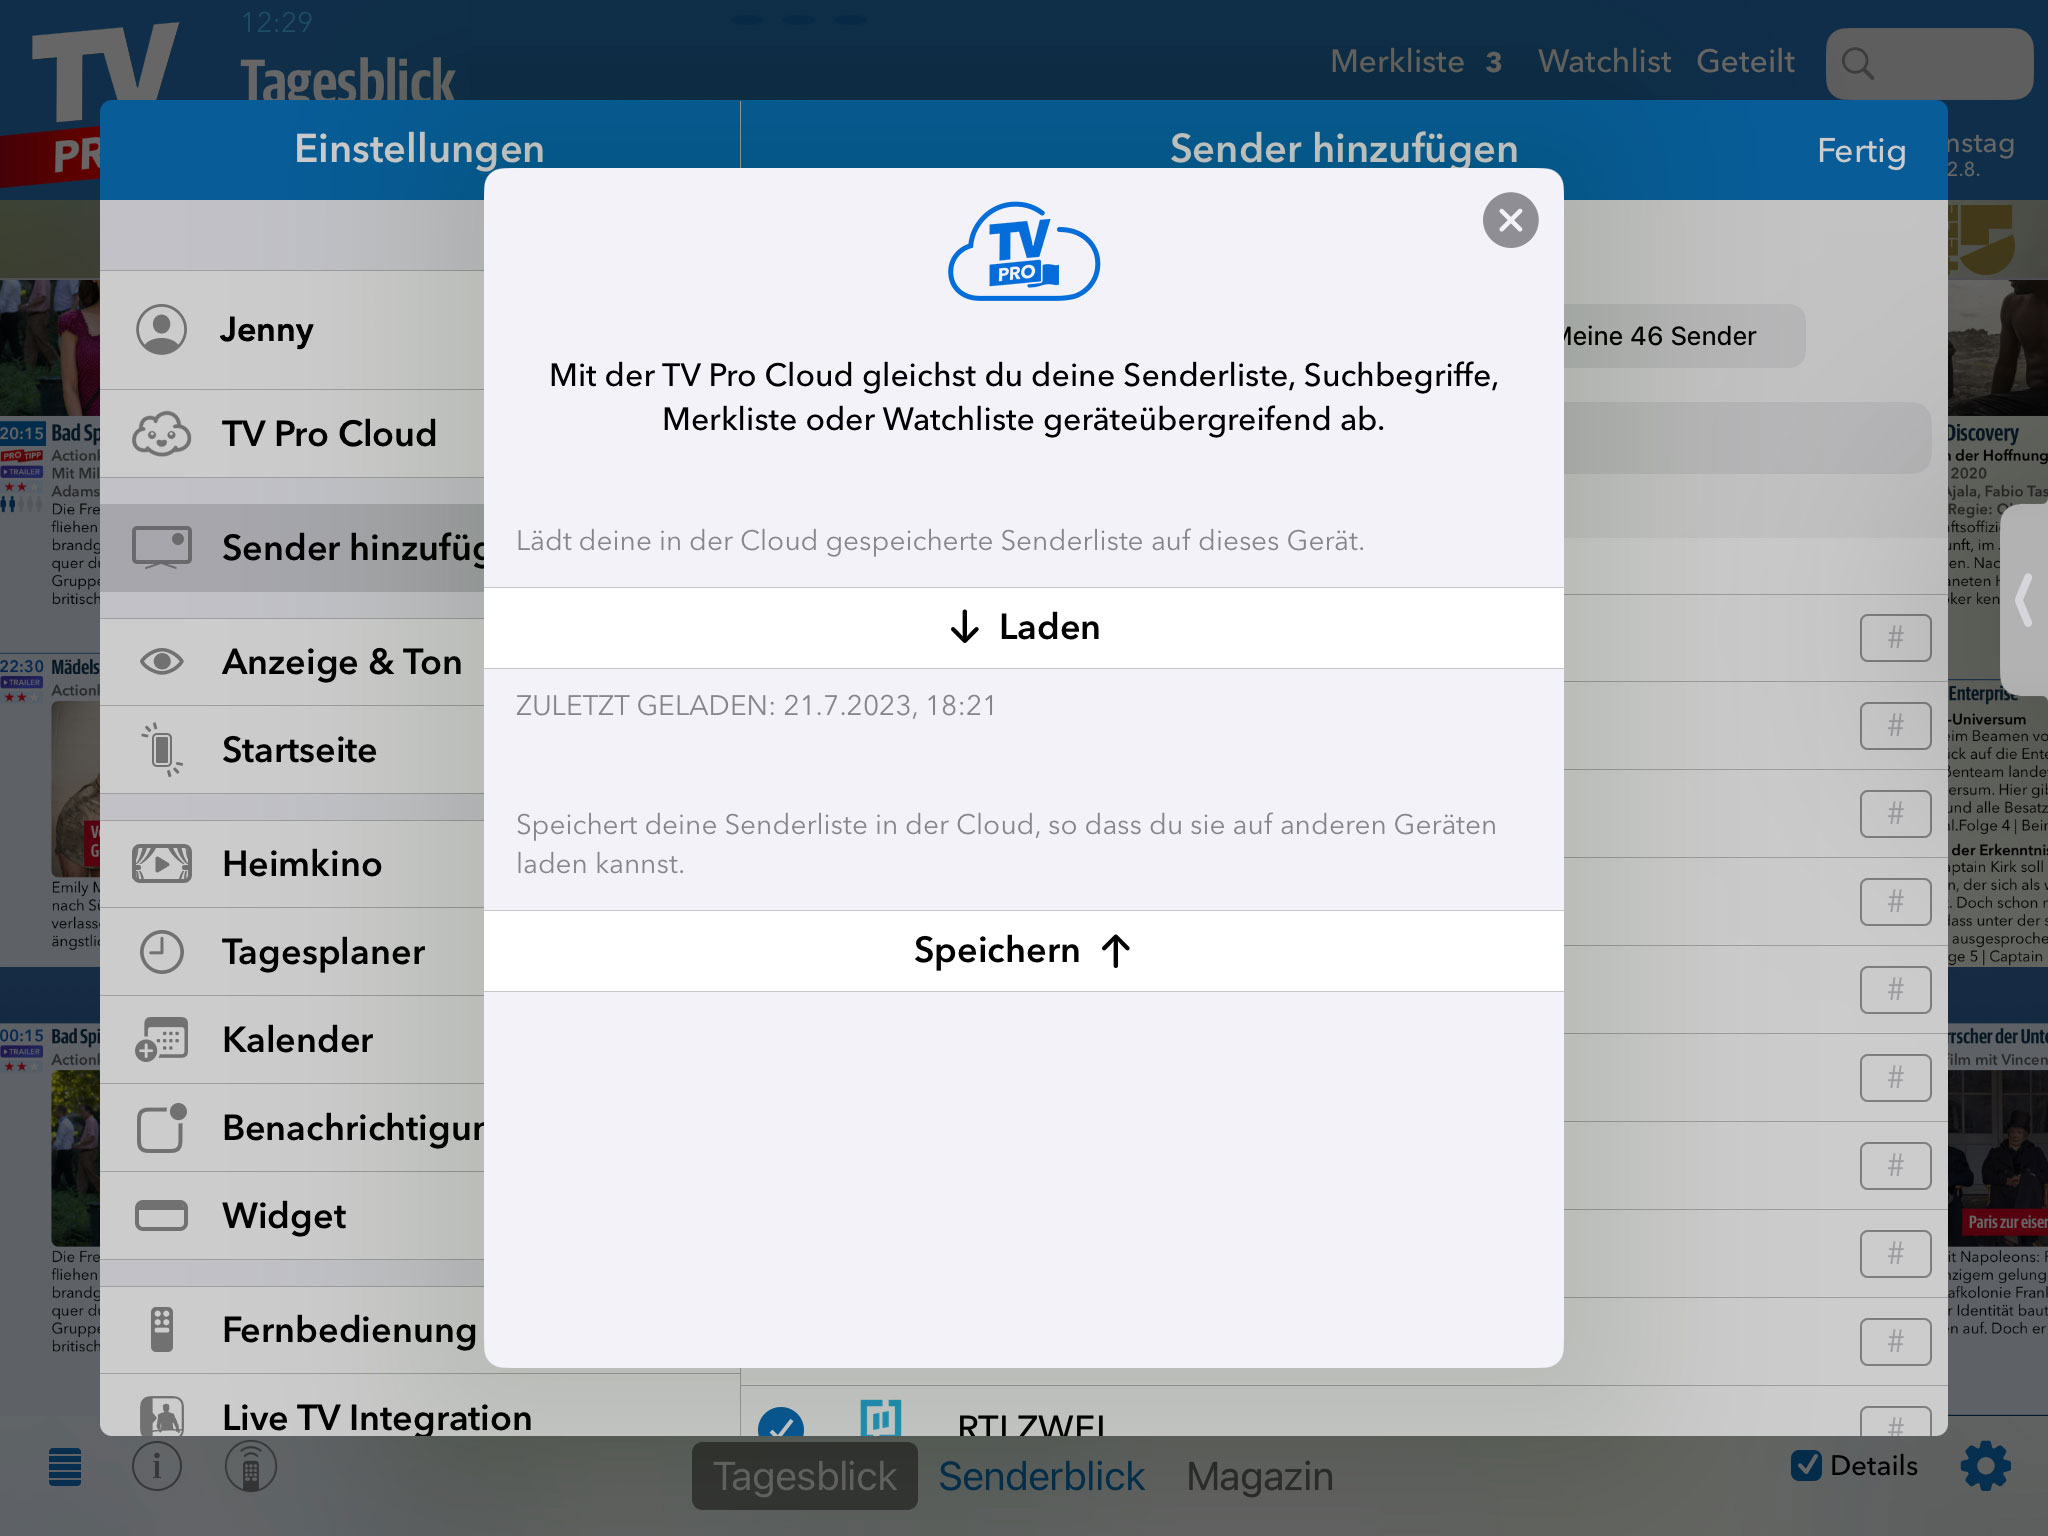
4. Now open TV Pro on your other iPhone or iPad and go to "Add Channels" in the TV Pro settings there as well.
5. Tap "Sync" and then "Load" there as well.
Now the channel list is loaded from the TV Pro Cloud onto your second device.
You can add your own streams in Live TV that are specified in an M3U file. This M3U file consists of a list of "m3u8" streams. You create this M3U file according to your wishes and then place it on your own web server. In the home network, a local web server is sufficient, as is often supplied with NAS drives. Then you add the M3U URL in Live TV. Done!
How does the mapping to the channels work?
The m3u file must use exactly the names for the stream names that Live TV uses. You can find the exact names of the channels in Live TV under "Settings" > "Channel Selection".
I have added a stream in my m3u file, but unfortunately it does not appear. Why?
You can only specify names in the M3U file that also exist in Live TV. All other names are currently ignored by the app and not displayed. In addition, you must ensure that your streams are in the "m3u8" format. Other formats are not supported (rtmp, etc.)
Where can I find my own streams in Live TV now?
Own streams are assigned to the existing channel names. Switch to the "Stream" tab, where the channel names will appear if you have assigned a stream.
Who is the manual addition of own stream sources suitable for?
For all those who are a little more familiar with the stream subject and for whom terms like M3U are not Chinese. For all those who use a TV receiver or television in the home network that can stream the TV program further in the local network (e.g. in higher resolution) and who want to receive this program with Live TV. We therefore do not provide technical support for this feature. We explicitly point out that this feature is intended for this personal use case.
TV Pro for iPad automatically downloads data for upcoming days. No further configuration is necessary. Simply leave the app open for a while, missing days will be automatically detected and reloaded.
Select the option "Own sequence":
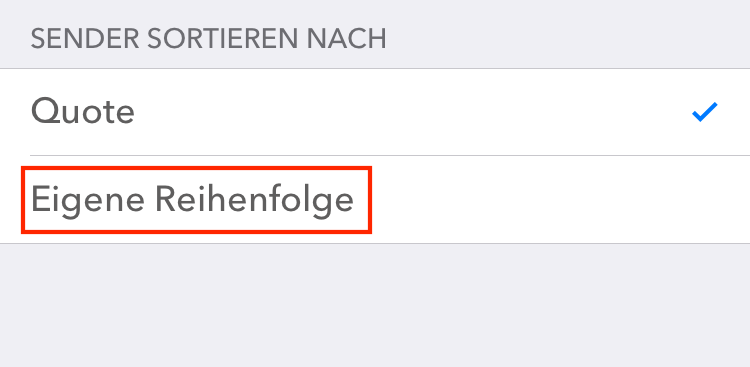
The sequence of the station can be set by drag and drop. Go to "Settings" > "Sender" and then arrange the sequence.
There, you can also hide the stations that do not interest you.
Please create a TV Pro ID. The watchlist will be synchronized via the TV Pro ID in the future. From version 5, iCloud will no longer be used for synchronization.
For older versions of TV Pro:
Please first check whether you are using iCloud Sync with the same Apple ID on both devices.
Then check under TV Pro > Settings > Data & iCloud whether the “Sync via iCloud” function is activated.
If it is activated, try deleting the TV Pro iCloud data from these settings on both devices and then try again.
Please make sure that the "Silent switch" on the the iPhone is turned off.
Homescreen > Settings > Cellular
Then scroll all the way to the end and turn off “Wi-Fi Assist” there.
2. In addition, you can generally prohibit an app from using Mobile Data there.
TV Pro Gold MAX is available for Mac or iOS. There are also combination packages for use on both platforms.
If an app is not behaving correctly, it can be restarted on an iPhone or iPad as follows:
On an iPhone / iPad with Face ID:
- Go back to the Home Screen
- Swipe up from the bottom edge of the screen and hold to show the App Switcher
- Swipe up on the app you want to close to close it
On an iPhone / iPad with Home Button
- Go back to the Home Screen
- Press the Home button twice to show the App Switcher
- Swipe up on the app you want to close to close it
From the theme collections of the TV Pro Mediathek, we also provide daily channels exclusively for the Live TV App. with 100% reportage. We propose a daily sequence of top channels in the form of a program schema. Here, our algorithm is able to select the top from the Mediatheken and high-quality media books at the main end time at 20:15.
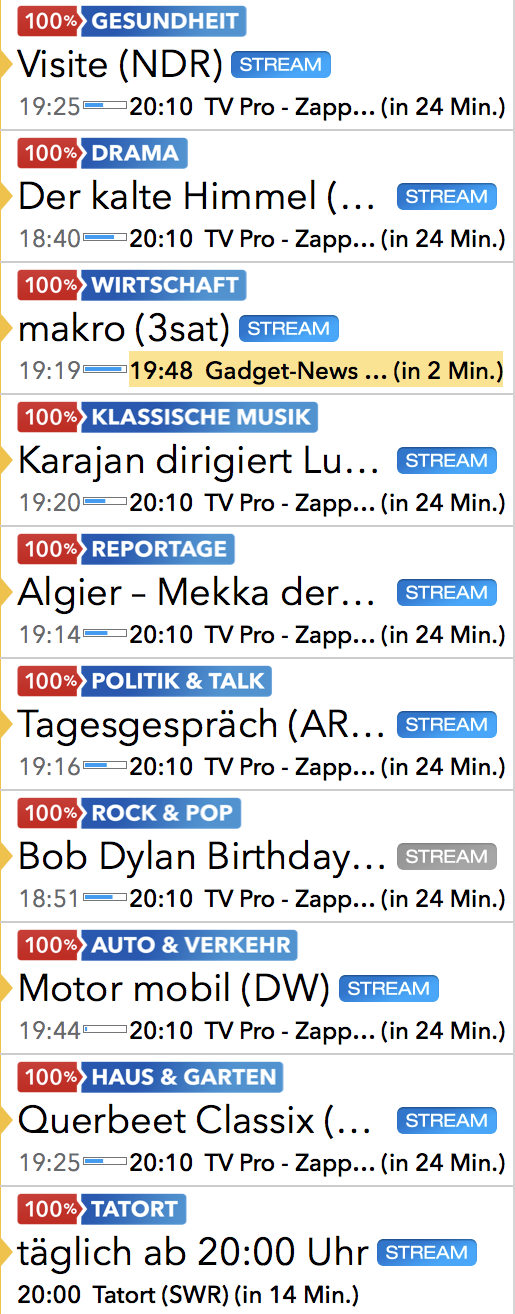
Live TV users receive these "100%" channels daily as part of the annual "My Live TV" package.
Currently, there are 16 "100% channels":
- 100% New & popular
- 100% Crime scene (daily from 8:15 pm)
- 100% Drama
- 100% Car & Traffic
- 100% Travel
- 100% Daily report
- 100% Documentaries
- 100% House & garden
- 100% Health
- 100% Cooking
- 100% Economy
- 100% Politics
- 100% Talk shows
- 100% Rock & Pop
- 100% Classical Music
- 100% Comedy
You can also permanently disable this option. To do this, select "Play in background" from "Settings".


iPhone
- Open TV Pro
- Go to Settings on the left in the menu
- In Settings, open Information
- Tap the word "Information" in the header three times
- A dialog will appear: "Logs are being sent ..."
- After successful sending, it will appear: "Logs have been successfully uploaded."
- If we have explicitly requested logs, please share the date and time with us so that we can assign the logs to your case.
iPad
- Open TV Pro
- Go to Settings at the bottom right
- In Settings, open Information
- Tap the word "Information" in the header three times
- A dialog will appear: "Logs are being sent ..."
- After successful sending, it will appear: "Logs have been successfully uploaded."
- If we have explicitly requested logs, please share the date and time with us so that we can assign the logs to your case.
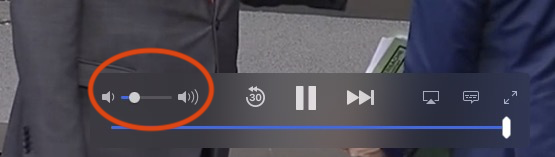
- Please check if your speakers are working and other apps are playing sound.
- There is a slider in the TV picture that controls the volume for the Live TV App. Please check that this slider is not set to minimum volume.
1. Check in which app the purchase was made
Please check in the first step in which app and on which platform you purchased the package. You can find the name of the app on the purchase receipt. Alternatively, you can also check in which app you purchased it by looking in the App Store settings under:App Store > Highlights > at the very bottom on "Apple ID: xxx" > Show Apple ID > SubscriptionsA package should be selected and active here.
2. Open app and transfer product status to TV Pro ID
Please open the app in which you purchased the package in the next step.- Please perform the following steps:
- 1. Open app
- 2. Open the store in the menu
- 3. Log in with your TV Pro ID or if you do not have a TV Pro ID yet, create a new TV Pro ID (free)
- 4. Tap "Restore Purchases"
3. Restore package on another device or in another app
To transfer your package to your second device or to another version, please follow these steps:- Open the corresponding app on the target device
- As described above, go to the Store settings and log in here with your TV Pro ID
- Tap "Restore Purchases"
- Now your package should also appear here
- Create your new TV Pro ID
- Log in to the app you used to purchase your package with your new TV Pro ID
- Select "Restore Purchases"
- Confirm that you want to transfer the package to the new TV Pro ID
- 3Sat
- Das Erste (ARD)
- Bayerischer Rundfunk (BR)
- Deutsche Welle (DW)
- Hessischer Rundfunk (HR)
- Kinderkanal (KiKA)
- Mitteldeutscher Rundfunk (MDR)
- Norddeutscher Rundfunk (NDR)
- ORF 1
- ORF 2
- ORF 3
- Phoenix
- Rundfunk Berlin-Brandenburg (RBB)
- Saarländischer Rundfunk (SR)
- Südwestrundfunk (SWR)
- Schweizer Radio und Fernsehen 1 (SRF 1)
- Schweizer Radio und Fernsehen 2 (SRF 2)
- Westdeutscher Rundfunk (WDR)
- Zweite Deutsche Fernsehen (ZDF)
- ZDFinfo
- ZDFneo
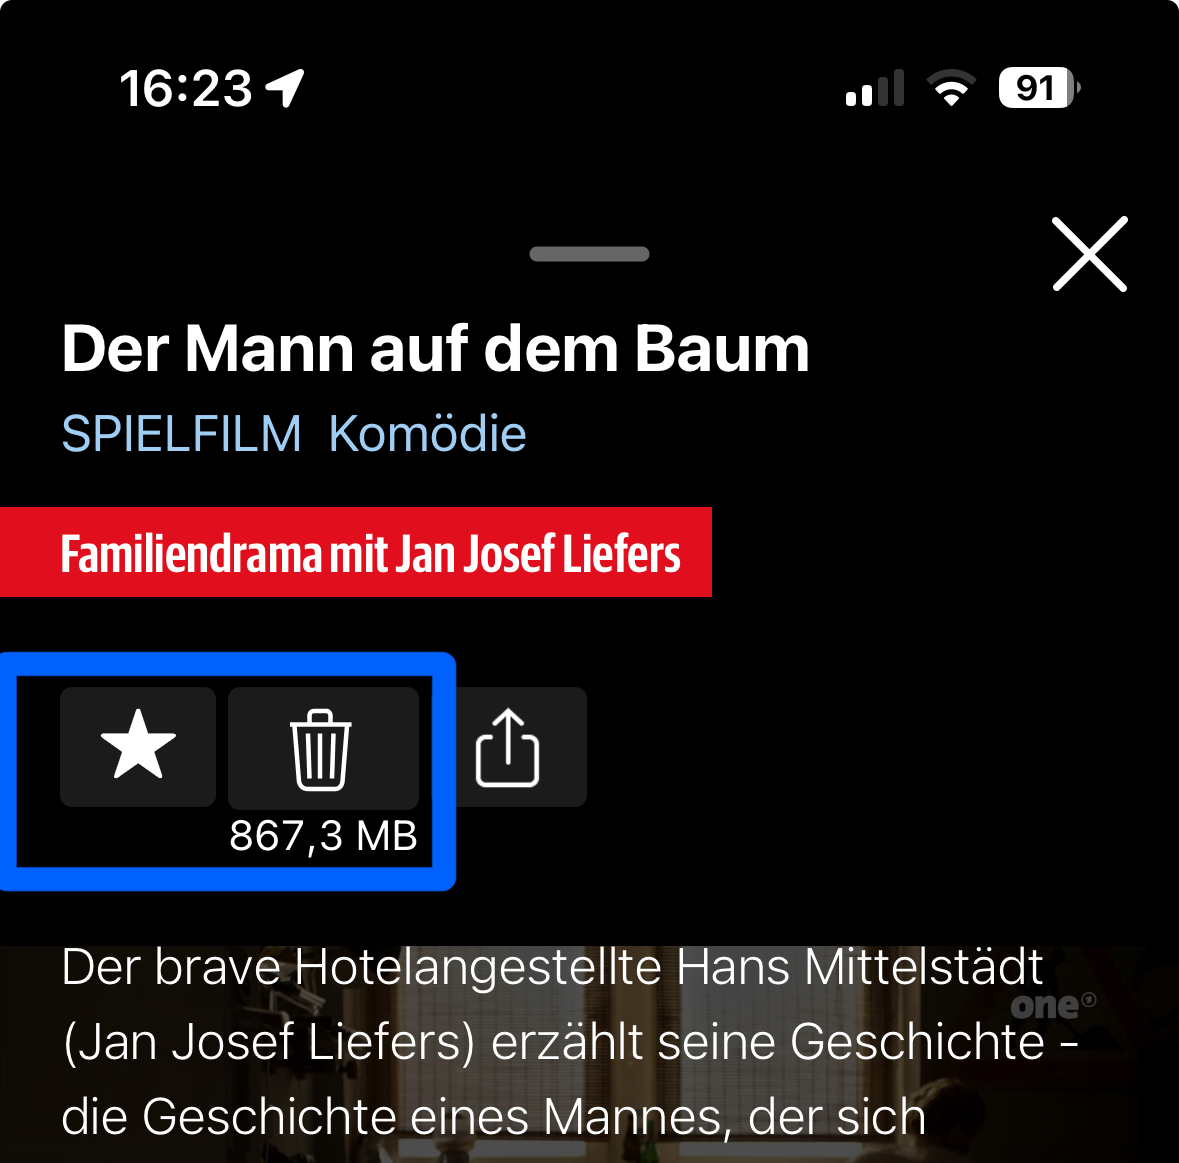 Alternatively, you can long press a preview image in the favorites view until a selection of options appears and then move your finger to the corresponding option:
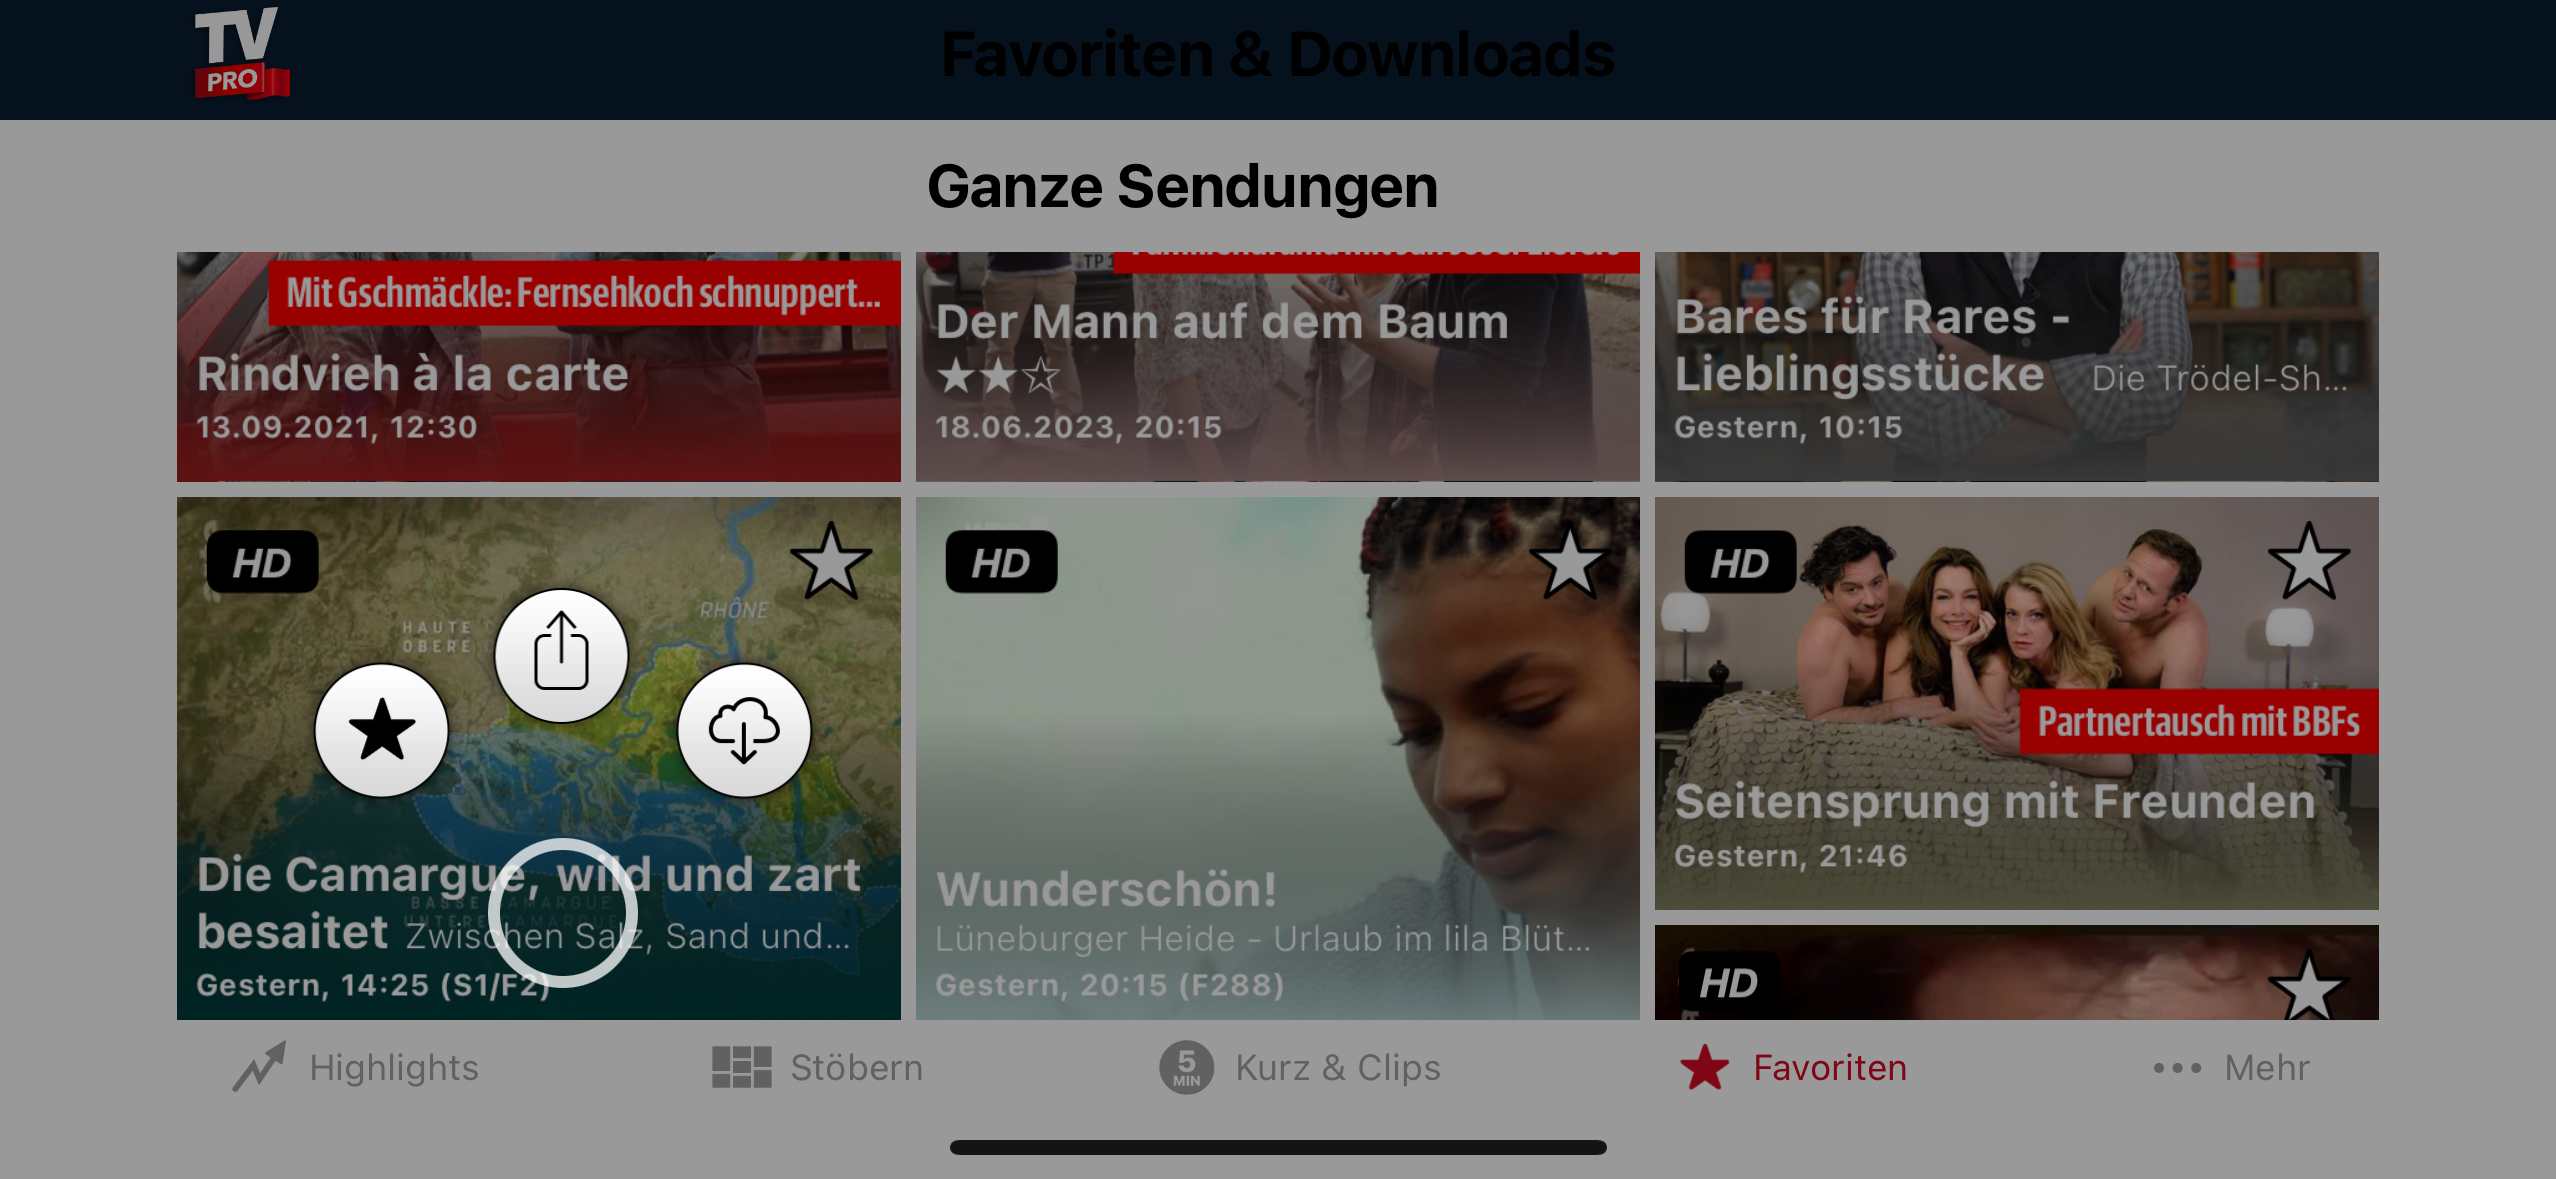 If the favorites still cannot be removed or reappear, go to the settings of TV Pro Mediathek and select "Data". There you can delete your favorites from iCloud with "Delete iCloud data". After that, they should also disappear from your favorites view.
Apple has made a change to the technical infrastructure for In-App Purchases and Subscriptions in recent days. To cope with this, the apps of the TV Pro App family need to be updated.
We have submitted corresponding updates to Apple and hope for a swift release by the AppStore team.
What to do?The respective app updates should appear in the AppStore shortly. Once the update is installed, the problem will be solved automatically. You do not need to contact the support team.
Which products are affected?
- Purchases and extensions since 08.02.2023 are affected
- Products purchased in the TV Pro Online Store are not affected
- Customers who previously secured their purchases in the TV Pro ID are also not affected
TV Pro Gold MAX is available for Mac or iOS. There are also combination packages for use on both platforms.
As soon as there is a new TV Pro version to test, you will receive an invitation by email. The sender will be TestFlight.
The email contains an invitation link. You can use this link to install the app via TestFlight – with just a few clicks.
What is TestFlight?
TestFlight from Apple is like an App Store for early versions. If you don't have this app on your device yet, you can download it from the App Store. If you already have TestFlight downloaded, tap “View in TestFlight” in the invitation email.
If your In-App purchase hasn't been activated after the purchase, please follow these steps in the Live TV App on your Mac:
‣ Open Live TV on your Mac
‣ Choose "Live TV" > "Restore Purchases" from the top menu bar
‣ Enter your Apple ID and password
You will now see a confirmation about the restored purchases.
 Select "Off" to turn off the subtitles for this channel. You can set this differently for each channel. Live TV remembers whether you have turned the subtitles on or off for this channel.
If subtitles are still displayed even though you have disabled them, check what is set in your iPad or iPhone system settings under Accessibility and there in "Subtitles & Closed Captions". If everything is also switched off here, it can help to briefly switch the switches on and off again.
Select "Off" to turn off the subtitles for this channel. You can set this differently for each channel. Live TV remembers whether you have turned the subtitles on or off for this channel.
If subtitles are still displayed even though you have disabled them, check what is set in your iPad or iPhone system settings under Accessibility and there in "Subtitles & Closed Captions". If everything is also switched off here, it can help to briefly switch the switches on and off again.
Unfortunately, TV manufacturers are constantly changing the protocol for the remote control, so it is almost impossible to keep up with it here.
We have therefore reluctantly decided in early 2020 to discontinue support for this. The remote control feature will therefore no longer be developed further. We will leave this feature in the app for existing users for at least two years (as of 03.02.2020) and then remove it.
Update 25.08.2022: With version 5 of TV Pro, the remote control code has now been removed.
Update 02.09.2022: We are planning a return of the old remote control code after persistent user feedback (strictly for existing users!) in version 5.0.5, without any guarantee of usability and without support. We look forward to the many 5 stars that were promised to us upon the return of the feature 😉 However, we would like to point out that we will have to remove the feature in a later version of TV Pro for technical reasons, as newer iOS versions impose restrictions that no longer allow the code to be used. Also, many (of course nice and purely motivating!) 1-star ratings will then not help either. Unfortunately!
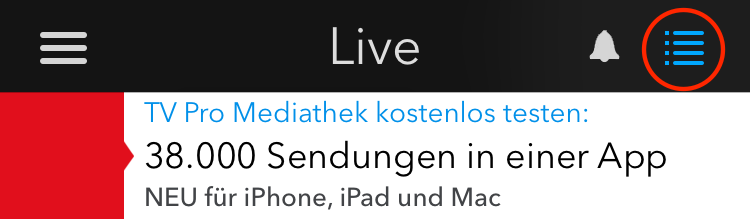
 On Apple TV, you can switch to this menu by swiping right and then down on the Apple Remote.
iOS (iPhone/iPad)
https://itunes.apple.com/de/app/id995947227?mt=8
macOS (Mac)
https://itunes.apple.com/de/app/live-tv/id715619301?mt=12
tvOS (Apple TV)
https://itunes.apple.com/de/app/id1051033237
If you bought a subscription for your iPhone, you can also run the subscription on your own iPad! As long as the devices are yours, there is no limitation on the number of devices that can run the subscription.
On all platforms, you can test the apps first. Each app runs independently. In-app purchases are purchased separately for each platform.
For the use of Live TV on iPhone / iPad, Mac and Apple TV there is TV Pro GOLD ALL-IN-1.
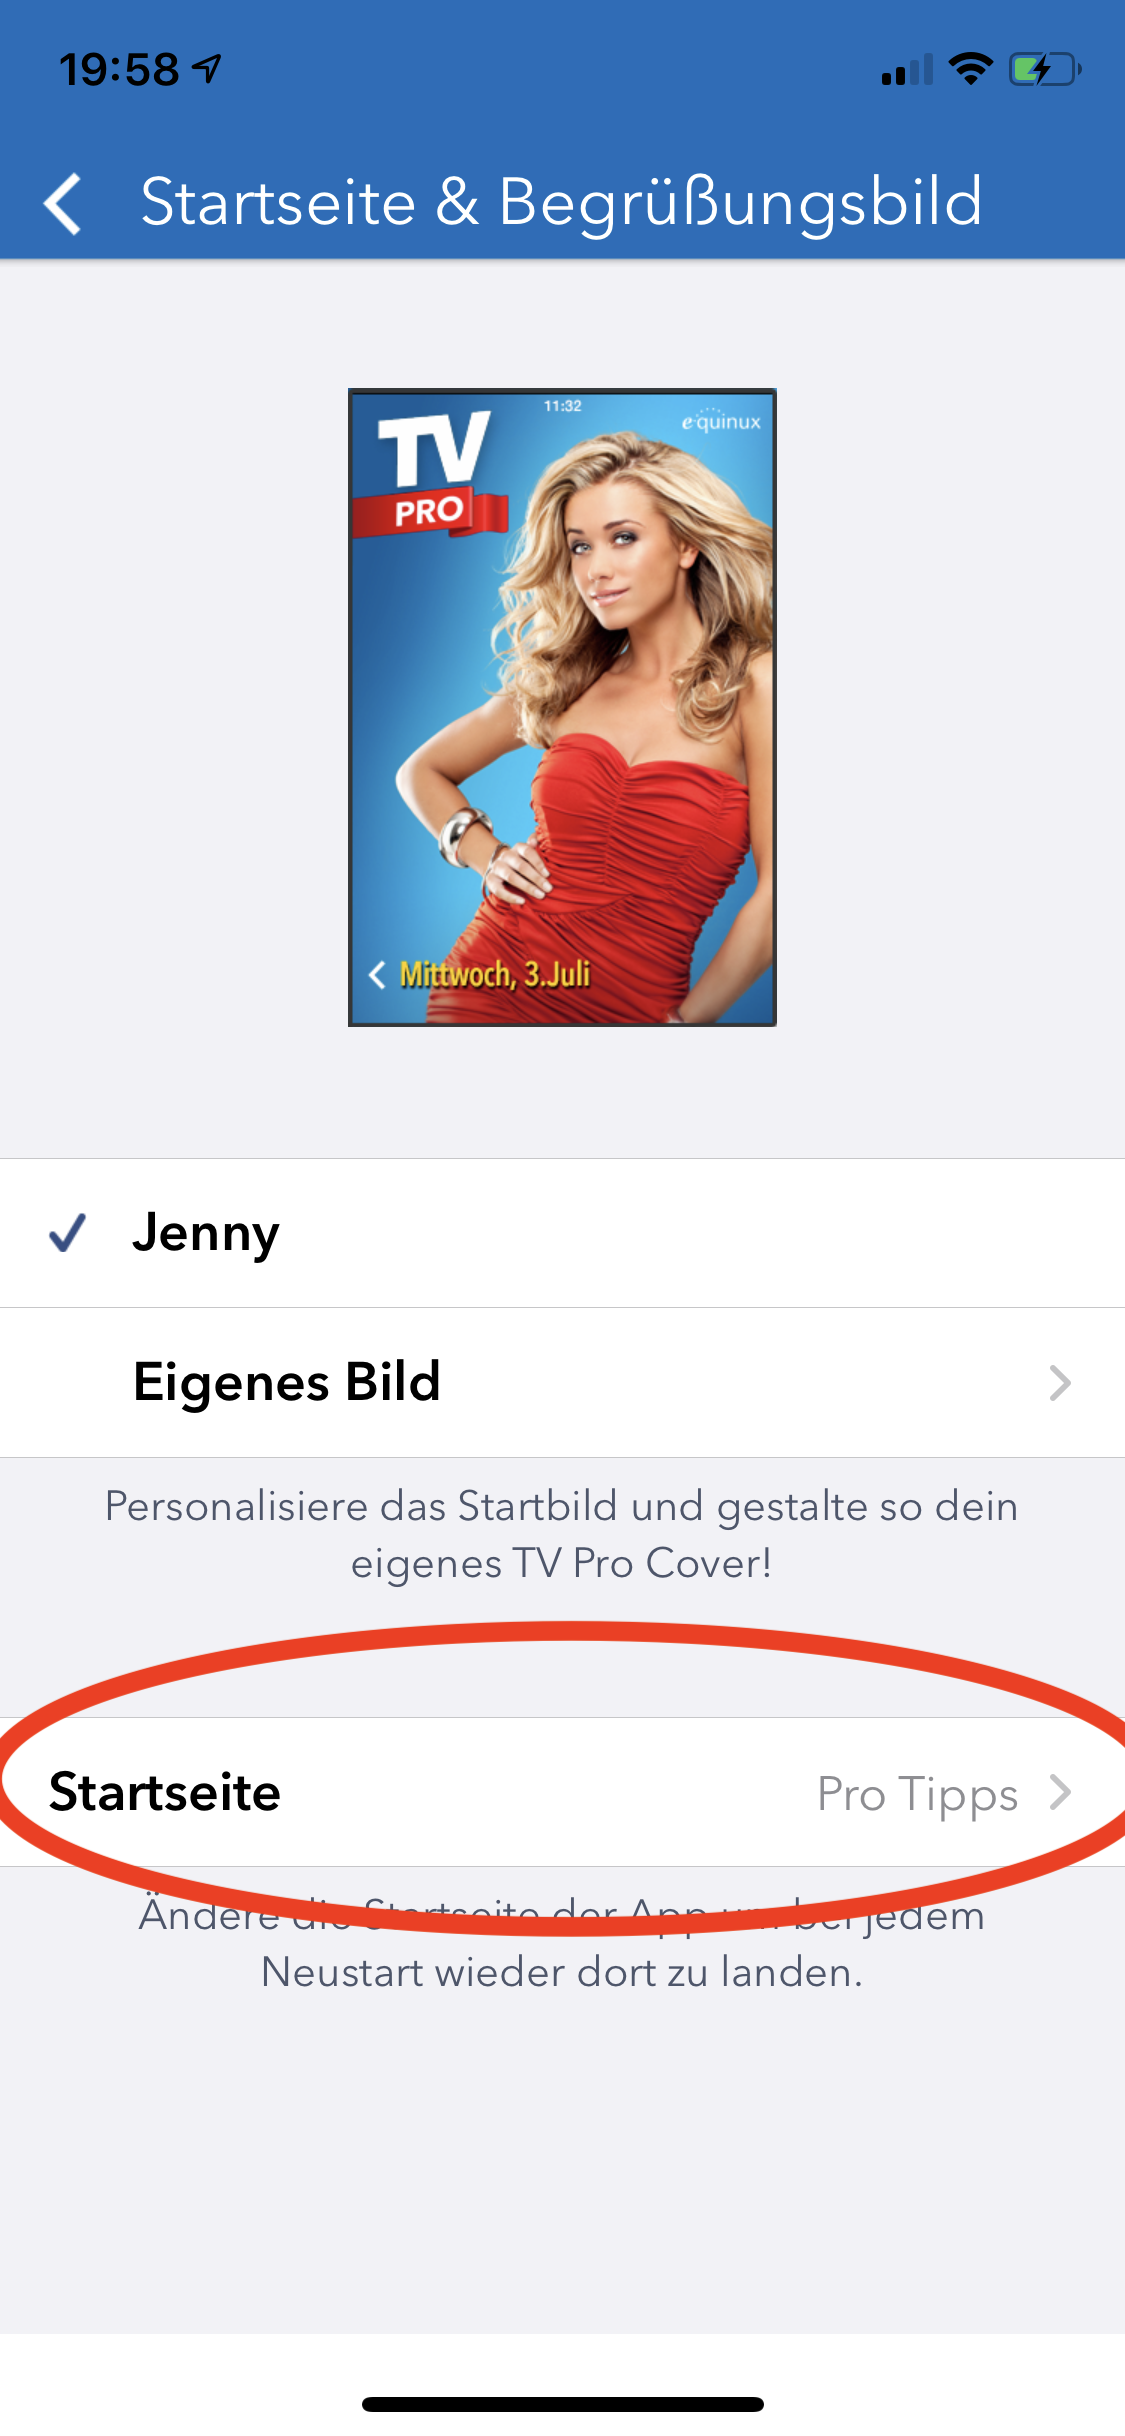
- Open Settings
- Tap on "Homepage & Welcome Image"
- Tap on Homepage and select the desired homepage
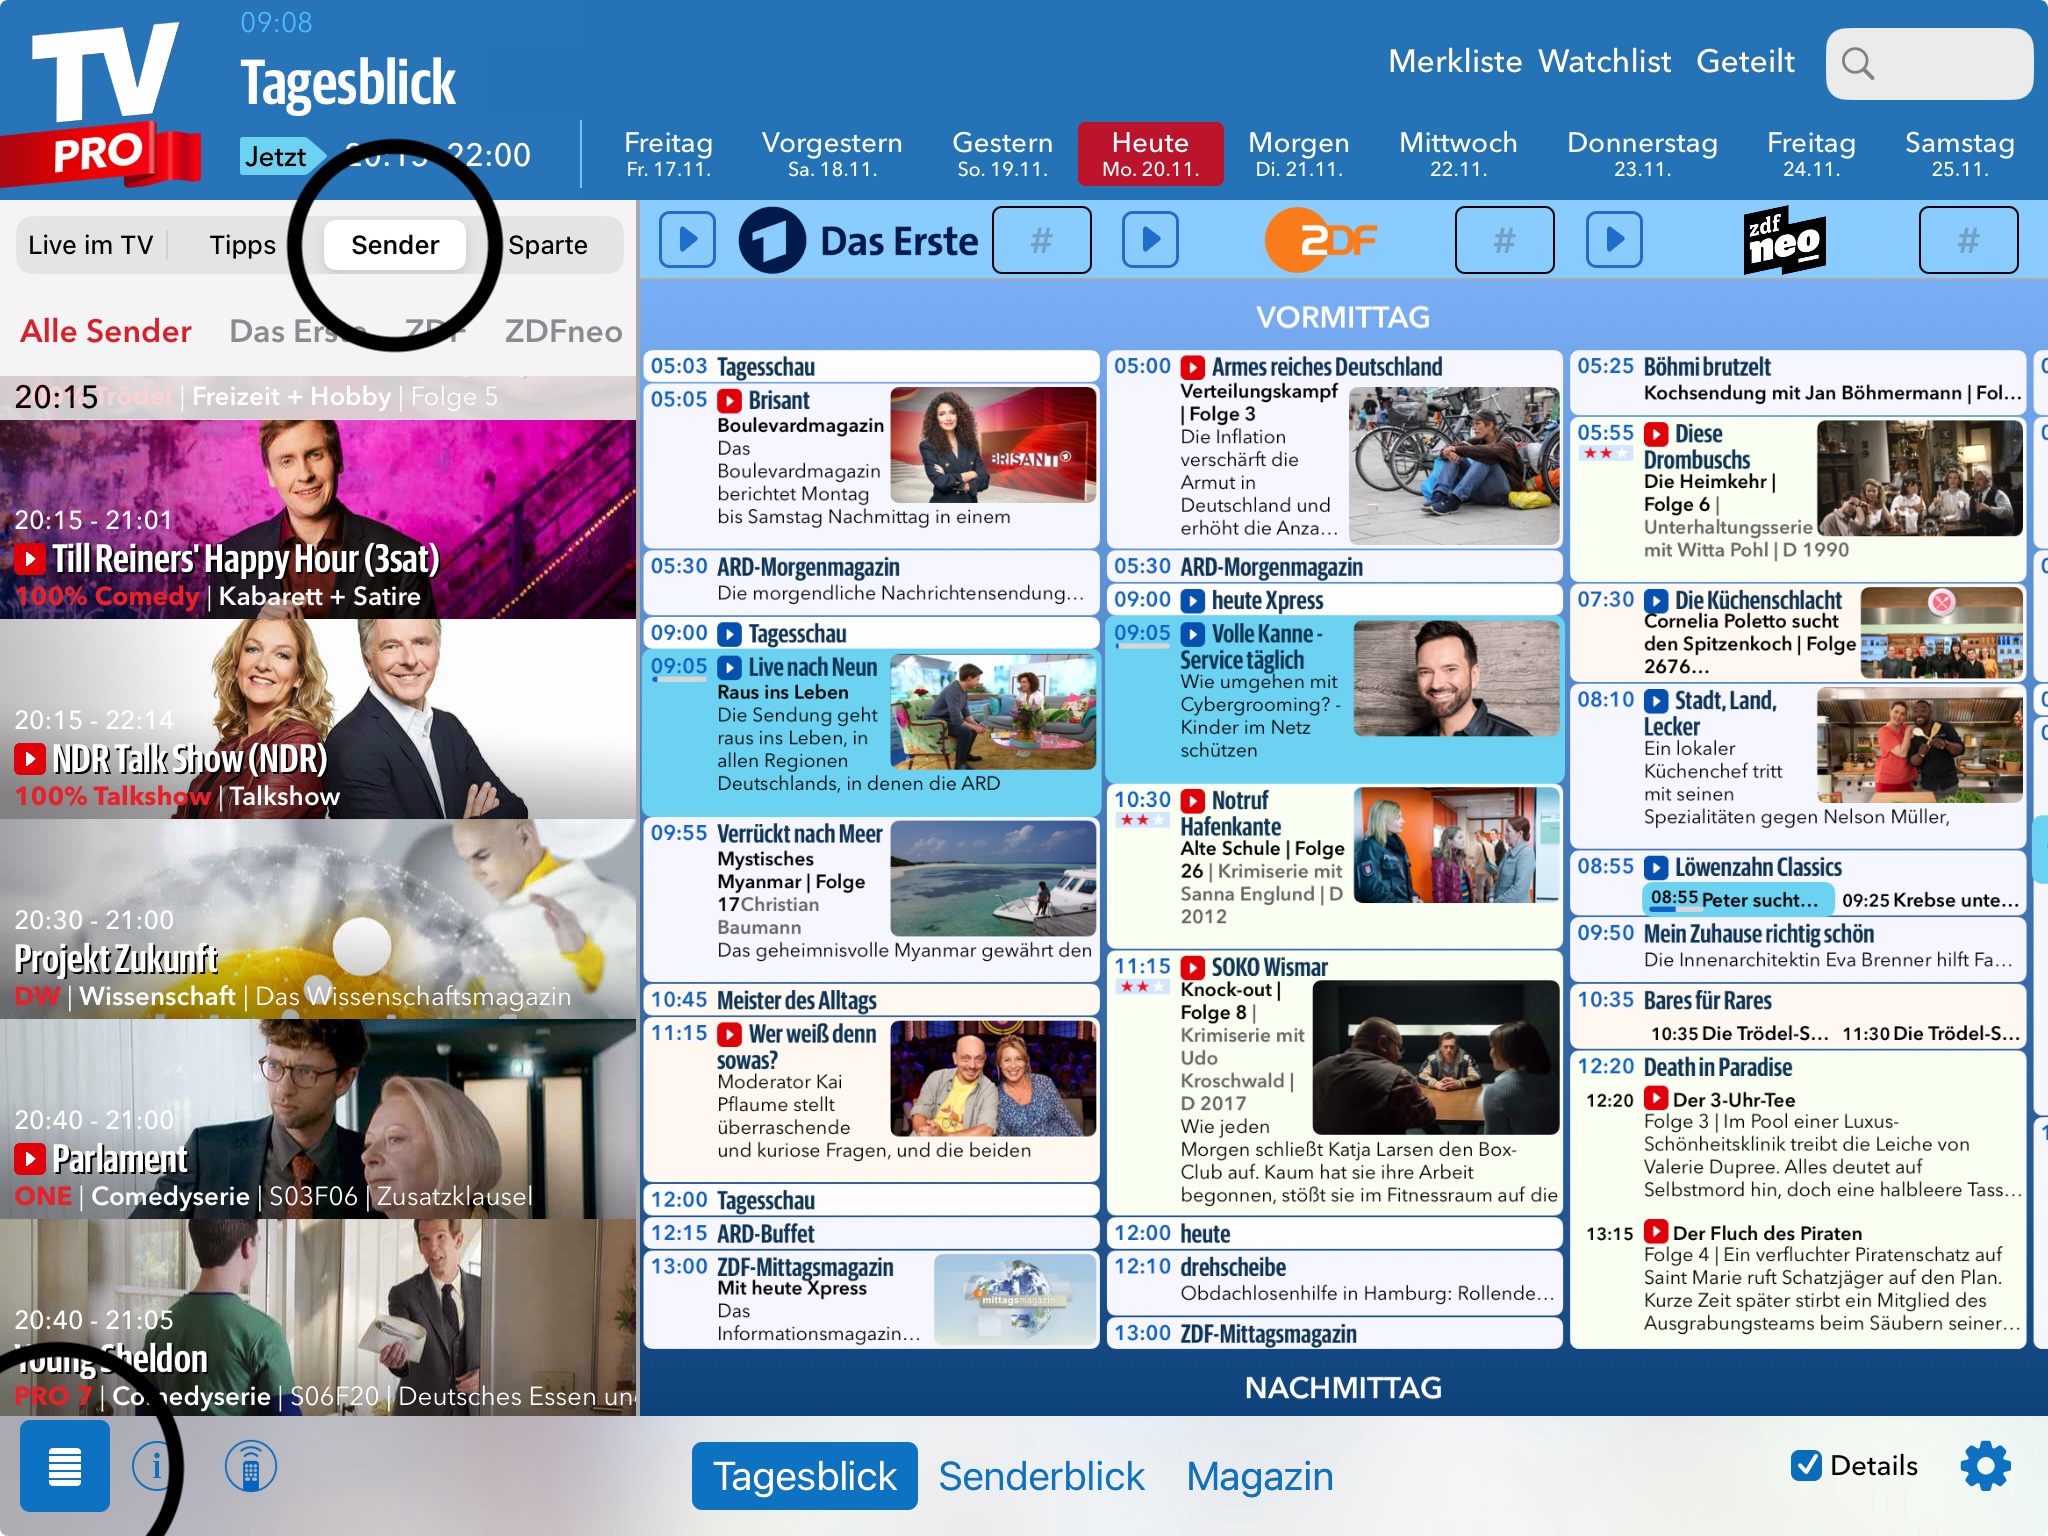
In modern style, all currently running programs are colored (you can also change the color in the settings). This allows you to quickly see what is currently running.
In the classic style of the daily overview, the programs are not colored, and instead you see a continuous line with the time.
If you purchased TV Pro or Live TV in the TV Pro Store (e.g. a TV Pro GOLD or ALL-IN-1 subscription), you can manage your payment option yourself at any time.
Here’s how:- Open the following link: https://store.equinux.com/storefront/subscriptions/
- Log in with the email address you used when purchasing your subscription.
- There you will find all your active subscriptions, the stored payment method and can update or change it if necessary.
If you purchased your subscription via the App Store, the payment options are managed directly via your Apple ID in the iOS settings.
Here's how you do it:
‣ Go to the AppStore settings: https://apple.co/2Th4vqI
‣ Choose your current TV Pro Media Kit
‣ Select the upgrade to TV Pro GOLD ALL-IN-1
‣ In TV Pro Mediathek, select a TV Pro ID
‣ Then, choose "Restore Purchases"
‣ Log in to your other devices with the same TV Pro ID (for Mac, iPhone / iPad and Apple TV)
Important is that you log in once where you bought the platform subscription - so if you currently have a package for iPhone / iPad, do the upgrade and then sign up on the iPhone with your TV Pro ID.
Note: Apple is in charge of the remaining term of the existing package, the credit will be paid separately about one day after purchase - it will not be charged immediately with the new package price).
Such notifications can be surprising – typical causes include restarts, updates, interrupted power connections, router restarts or a device reconnecting to the internet in the background. Use by family members can also be the trigger.
If the information in the email is plausible (e.g. provider or time), it is usually a legitimate registration – you do not need to do anything further.
However, if the information is unfamiliar to you, we recommend changing your password as a precaution.
TV Pro Gold MAX is available for Mac or iOS. In addition, there are combo packages for use on both platforms.
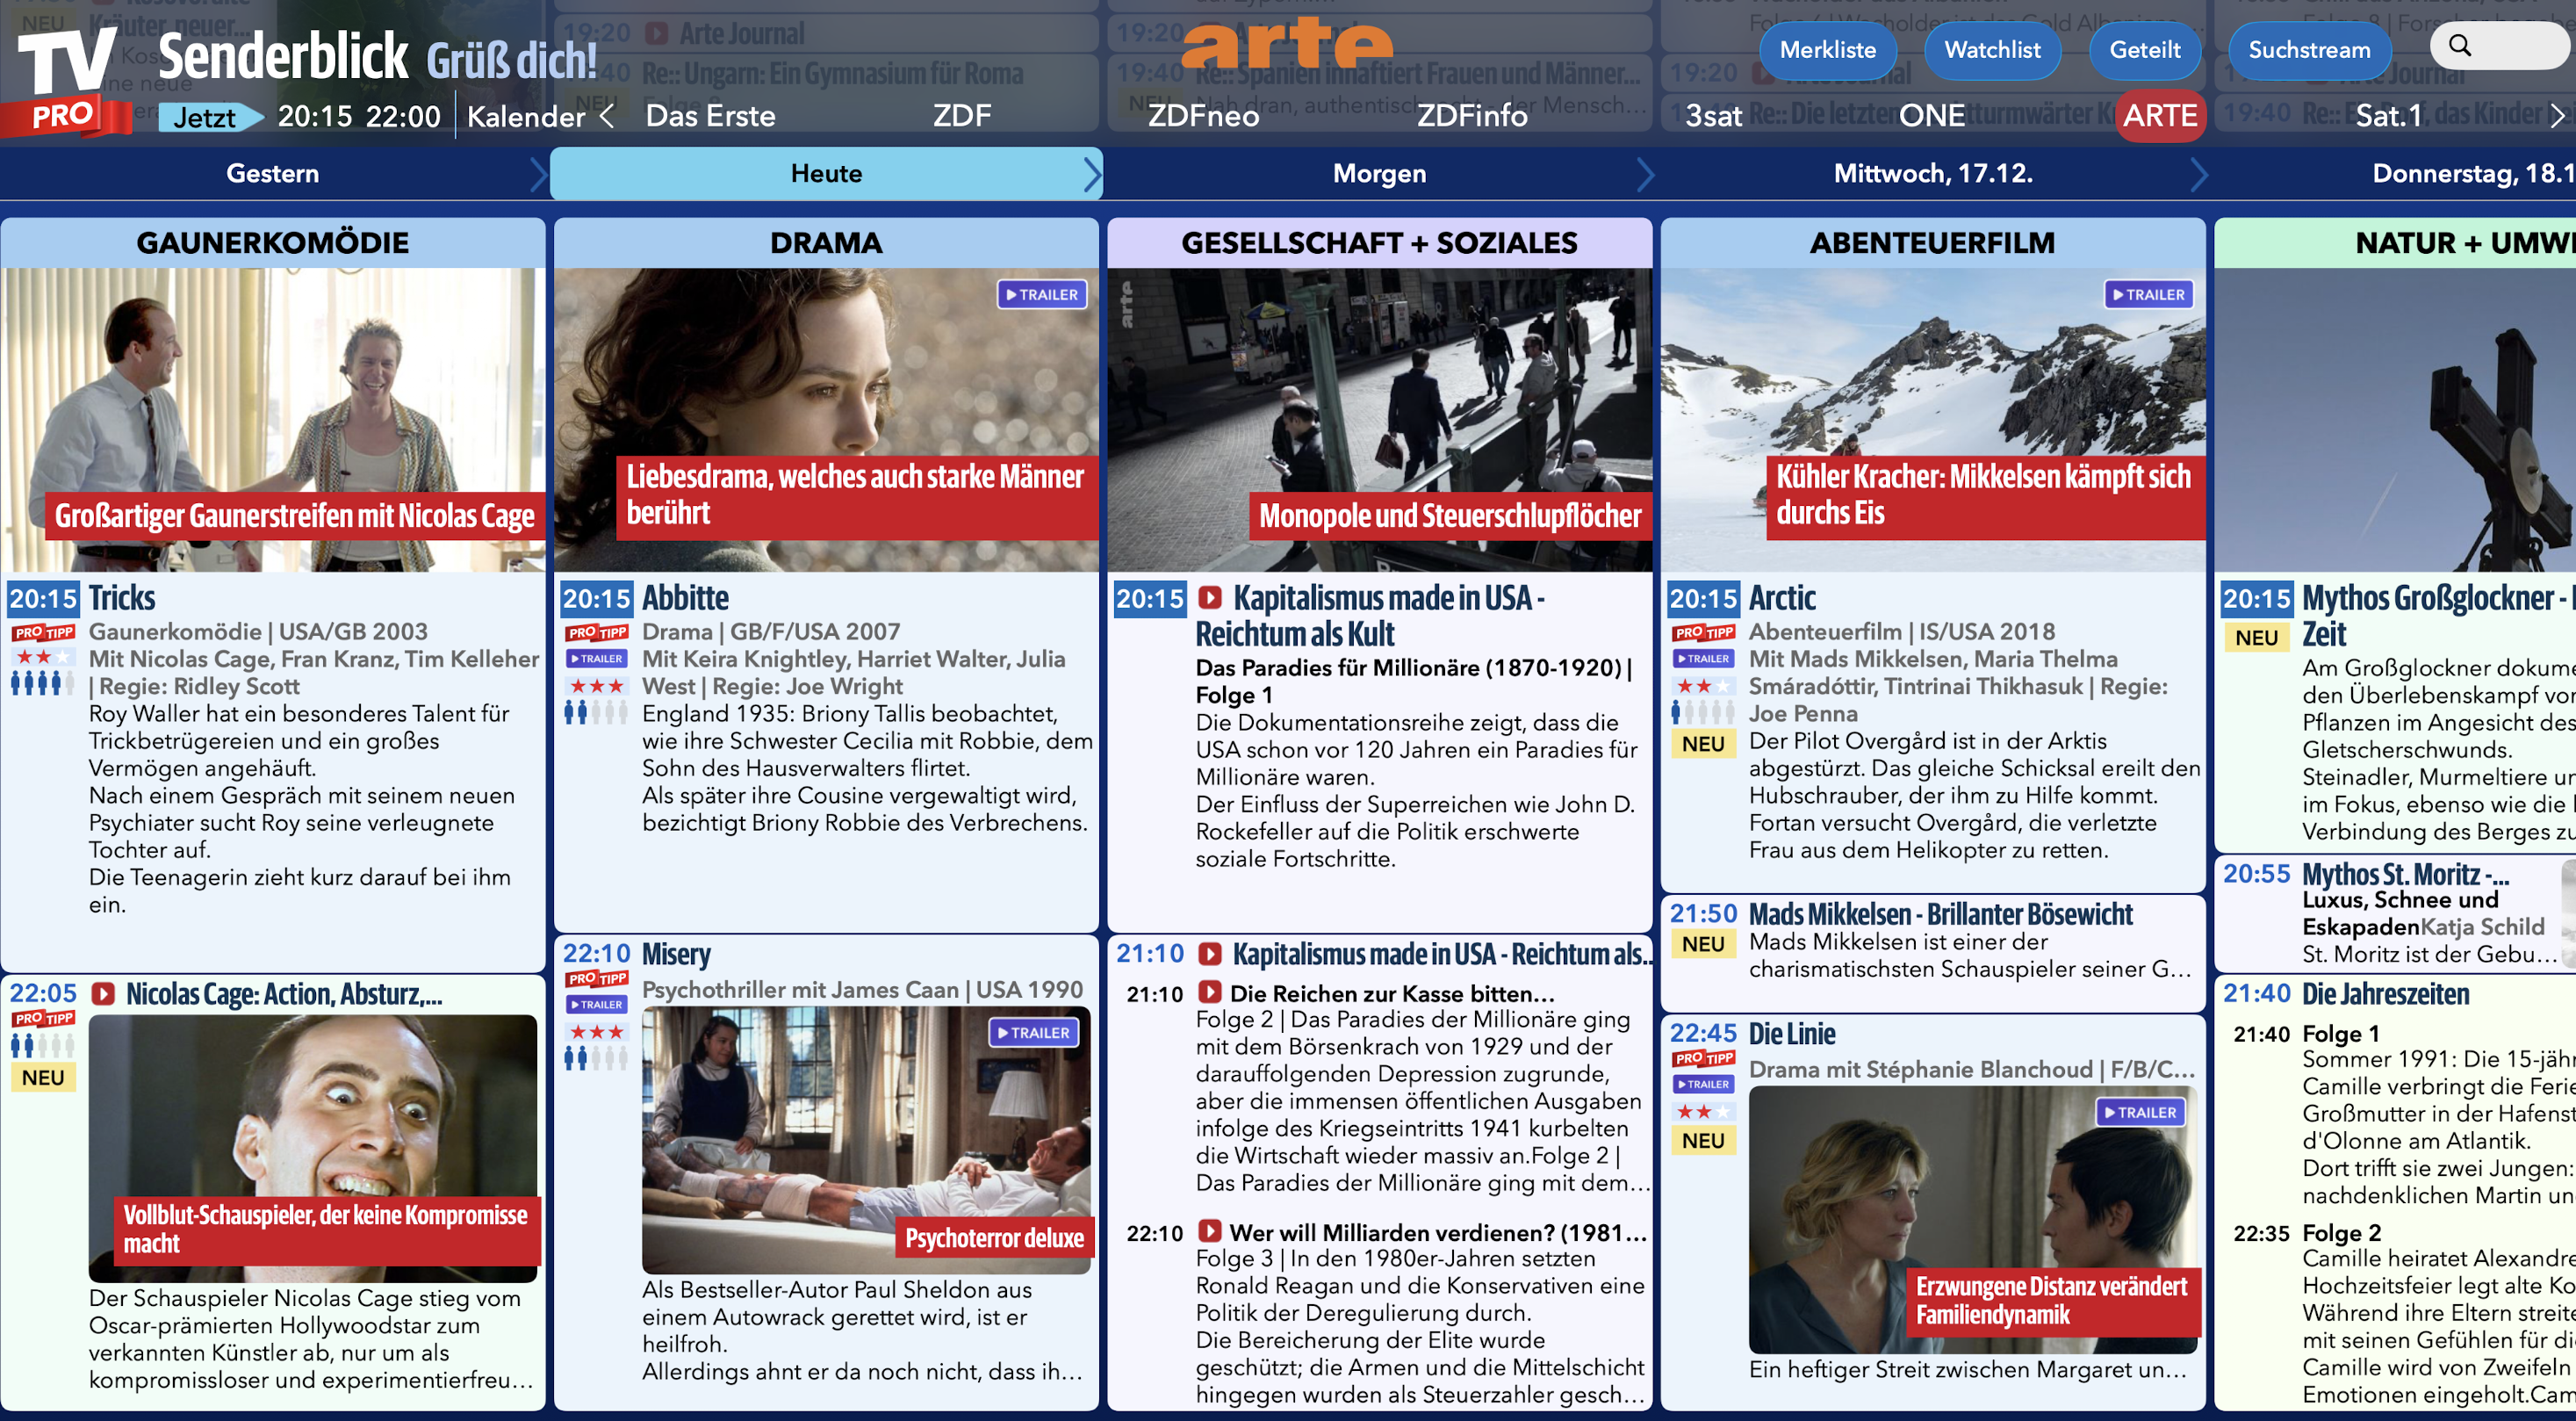
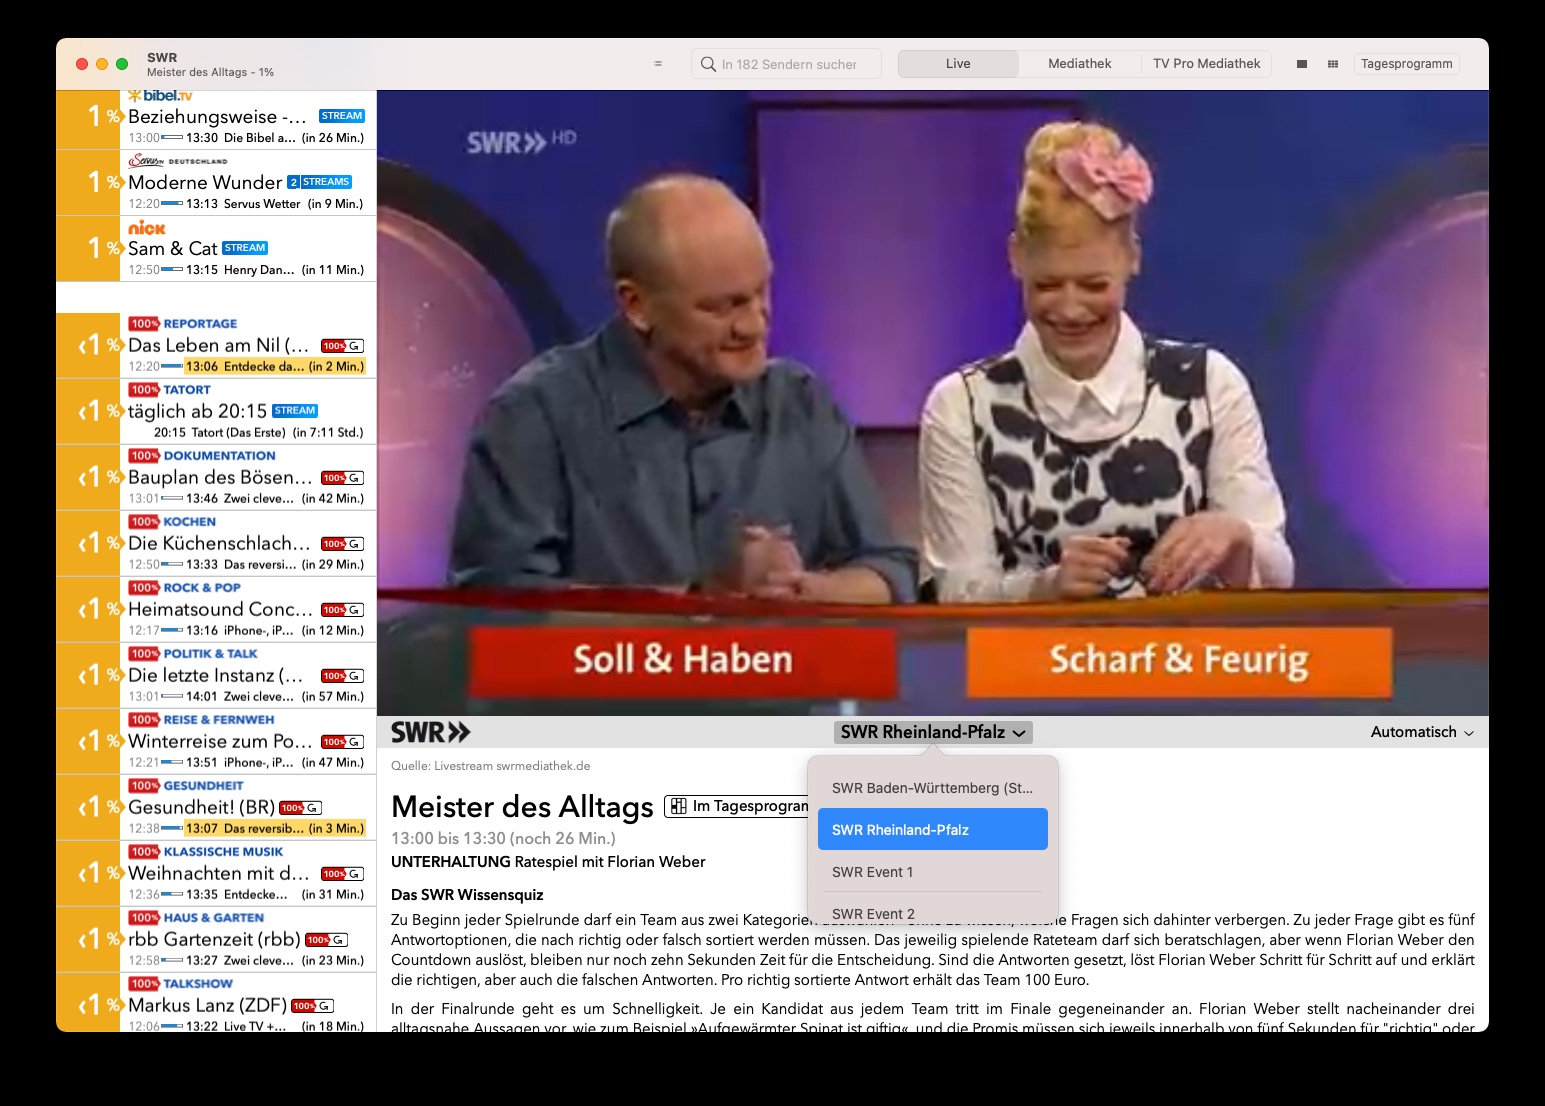
In the Daily View, all running programs are highlighted in color. You can recognize channels with a Live TV stream by the large blue play arrow next to the channel logo: tap and watch TV immediately.
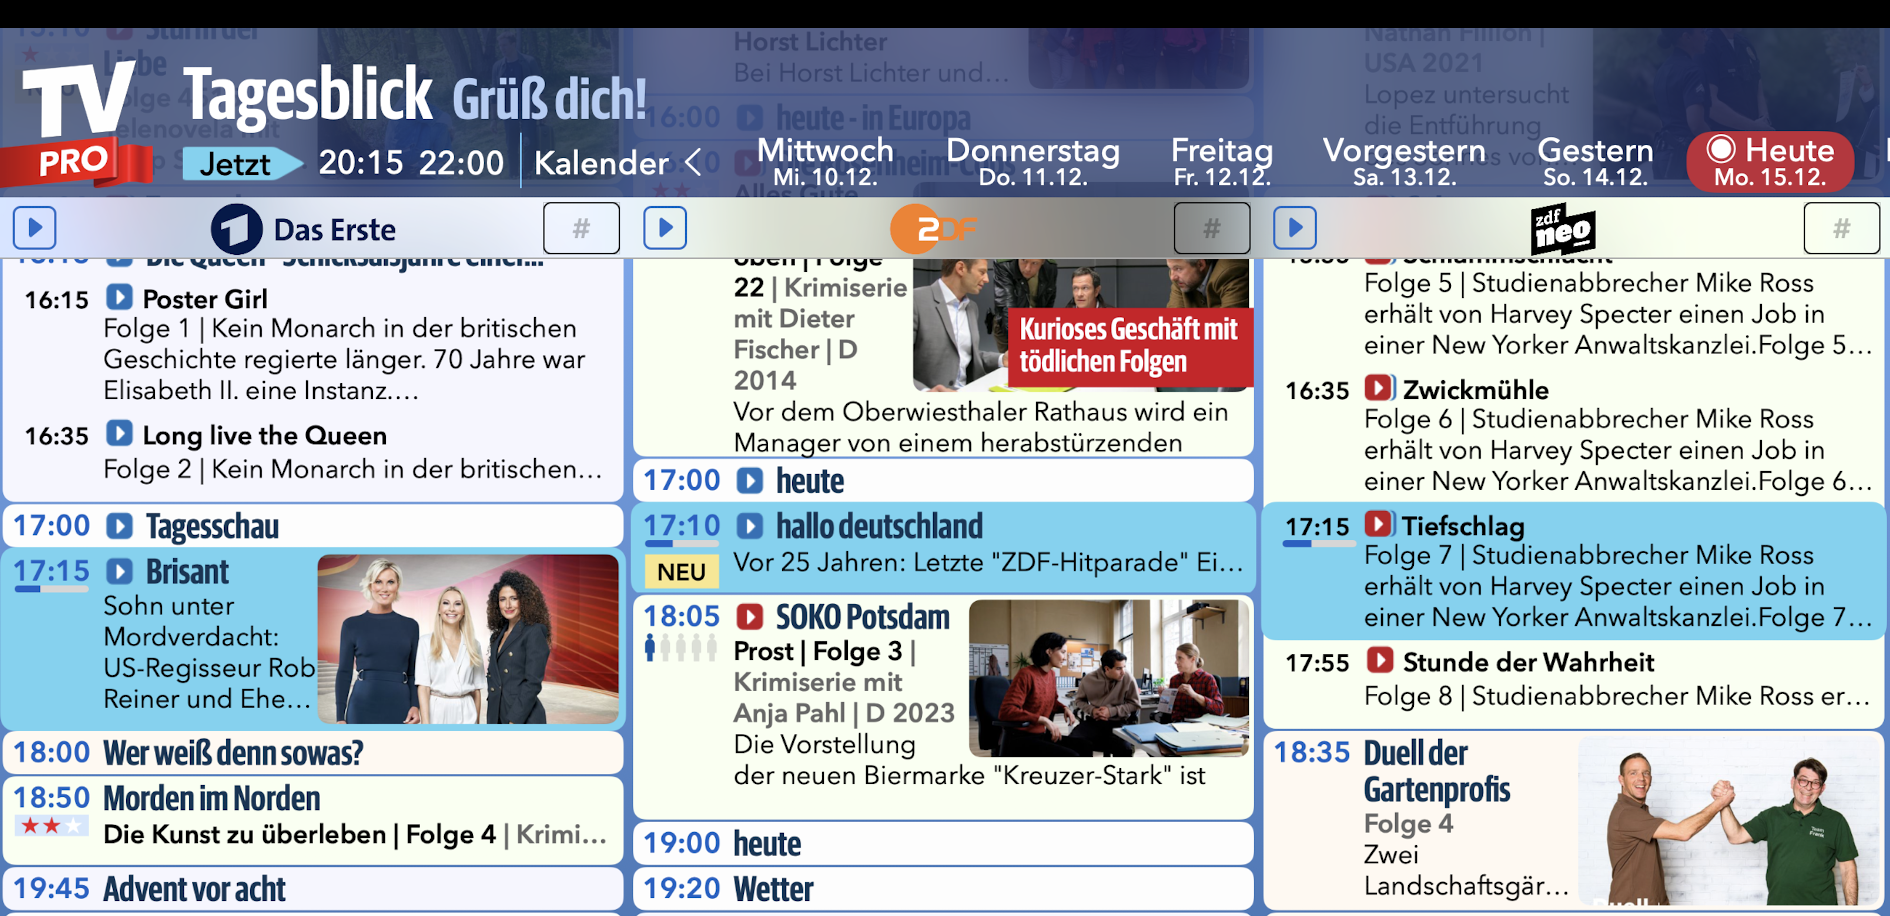
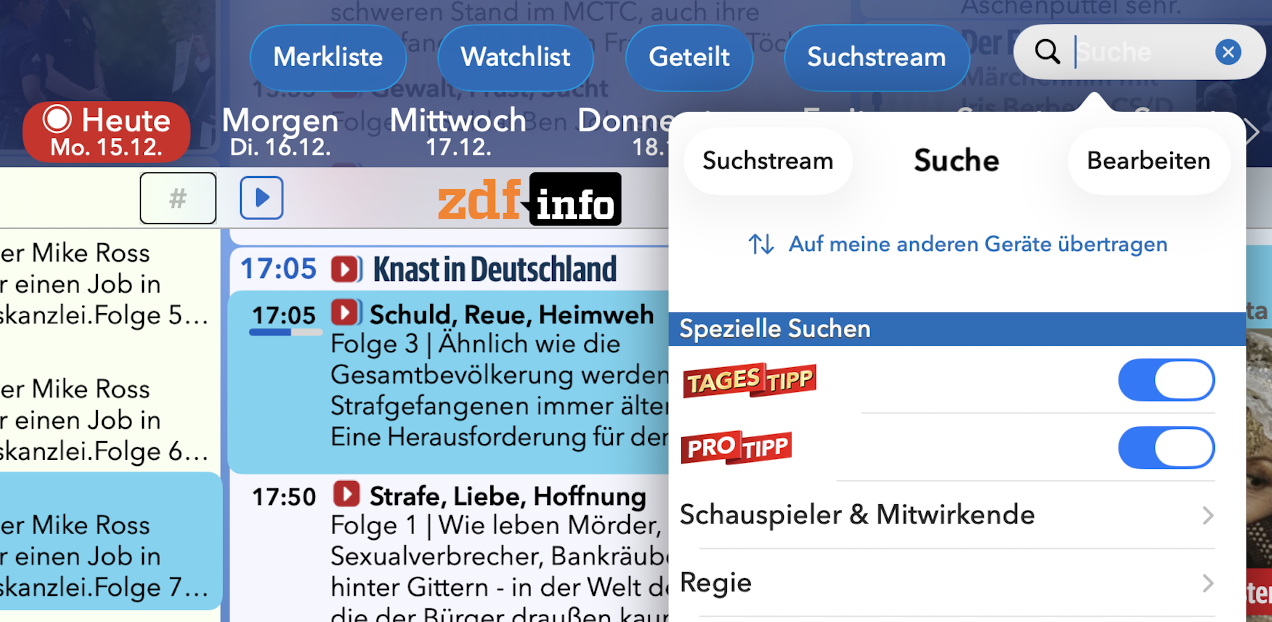
What programs does the TV Pro editorial team recommend today?
You can turn on ProTips and Daily Tips in the search. They now appear daily clearly in your search stream.
In addition, ProTips and Daily Tips are marked in the Daily View and Channel View.
What are other users watching today?
You recognize User Tips in the Daily View by the number of male symbols under the time. Programs with many pre-bookings have five male symbols.

- Open the Google Play Store app
- Tap the menu > My apps & games
- Apps with an available update are marked with "Update"
- Select the TV Pro or Live TV app
- Tap Update
You can find this and many other tips on our Tips & Tricks page.
 Update 2021: From now on, some channels (especially ZDF Group) send the subtitles with the normal stream. To activate subtitles, use the player's overlay, tap on the speech bubble there:
 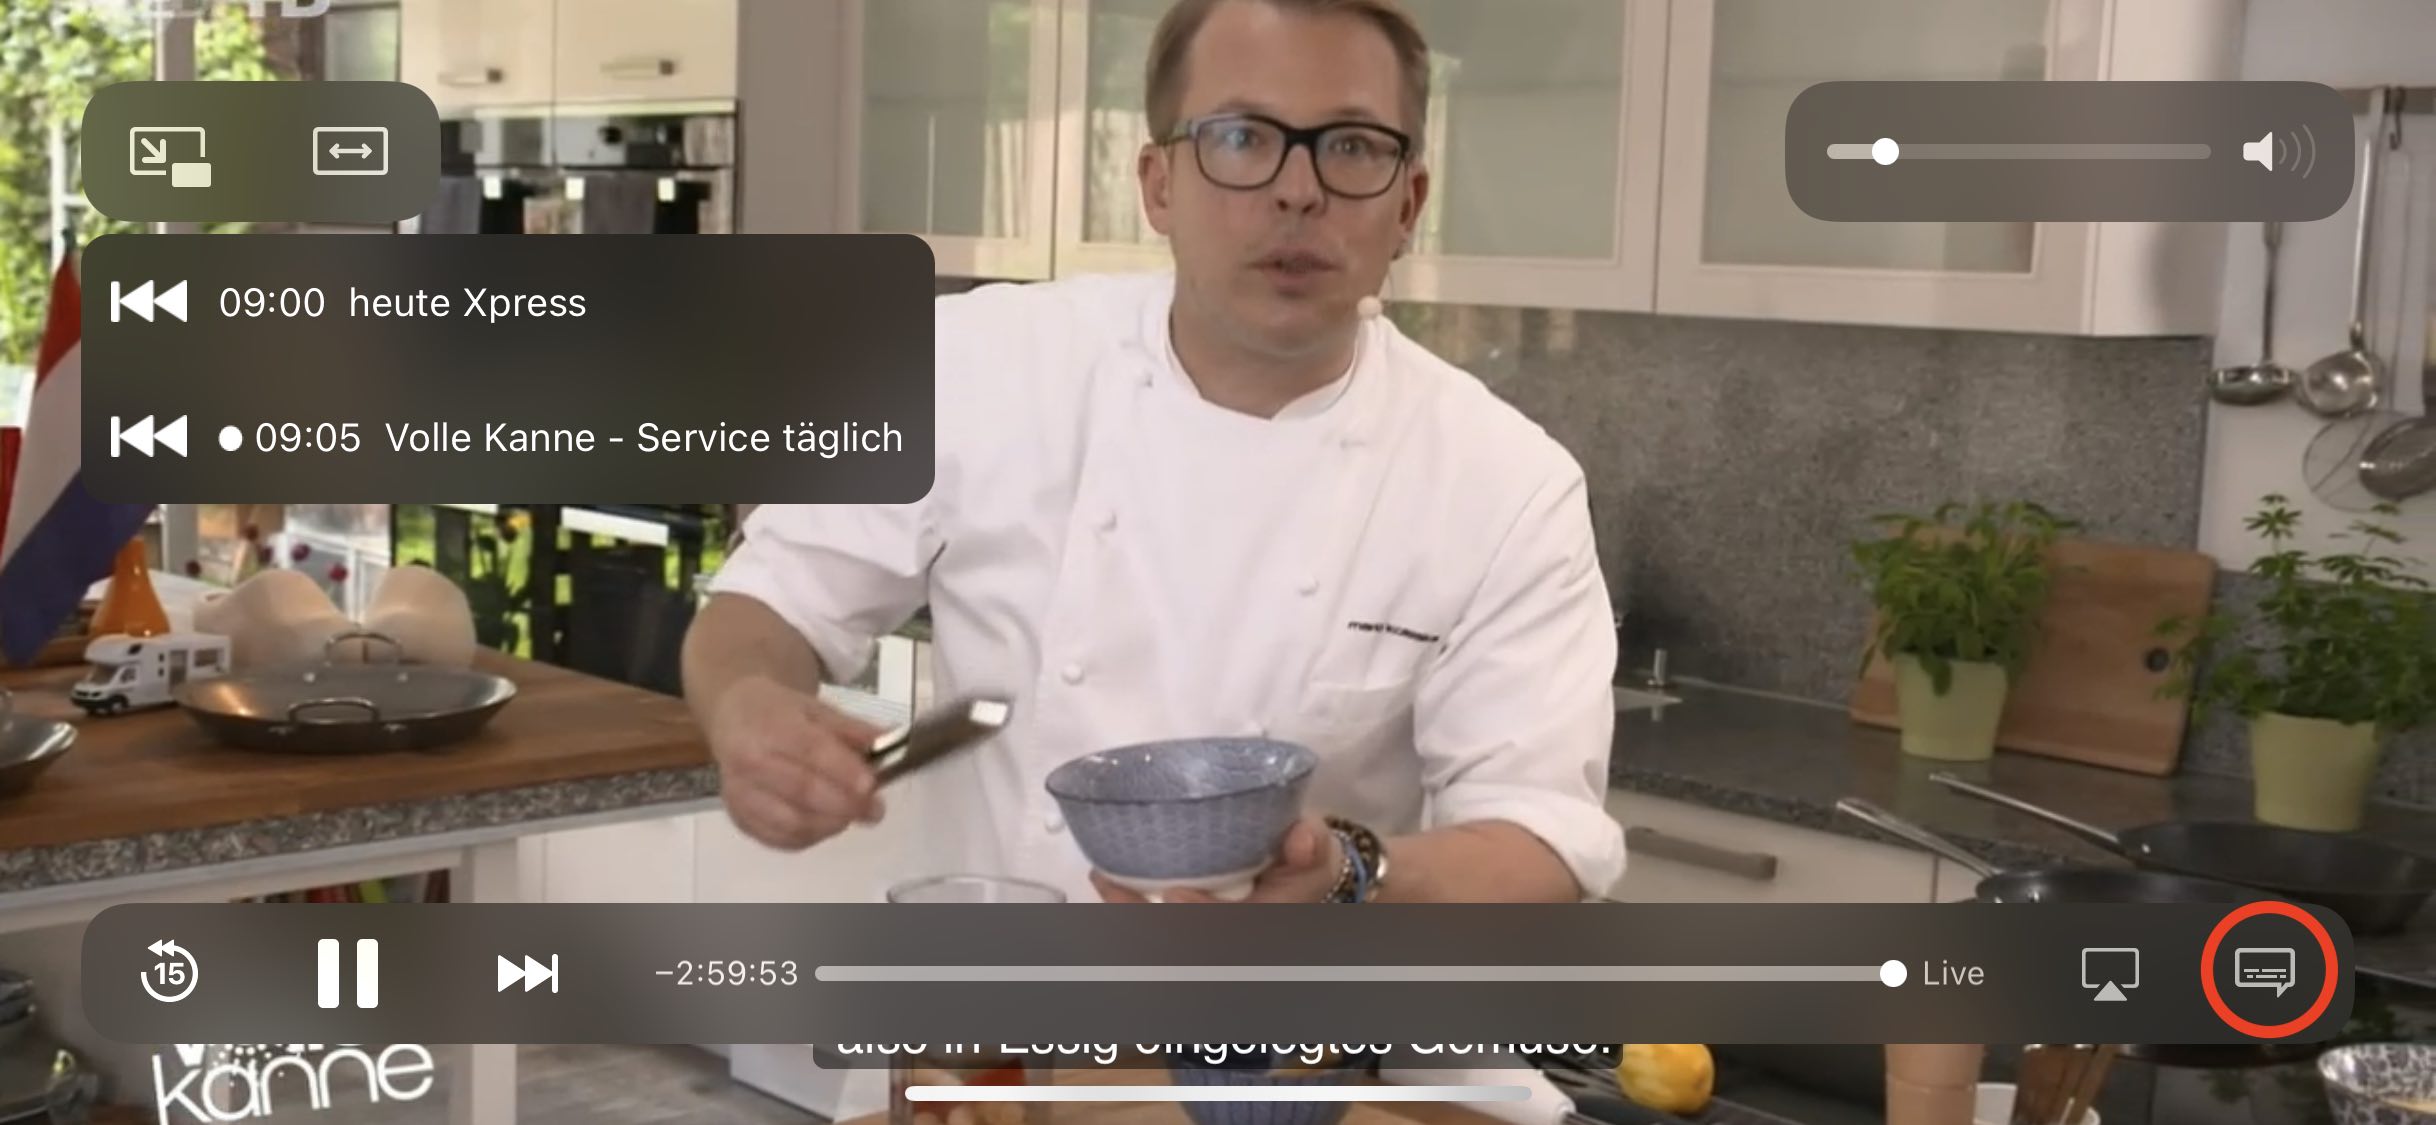 In the "Subtitles" section, you switch the corresponding language on or off:
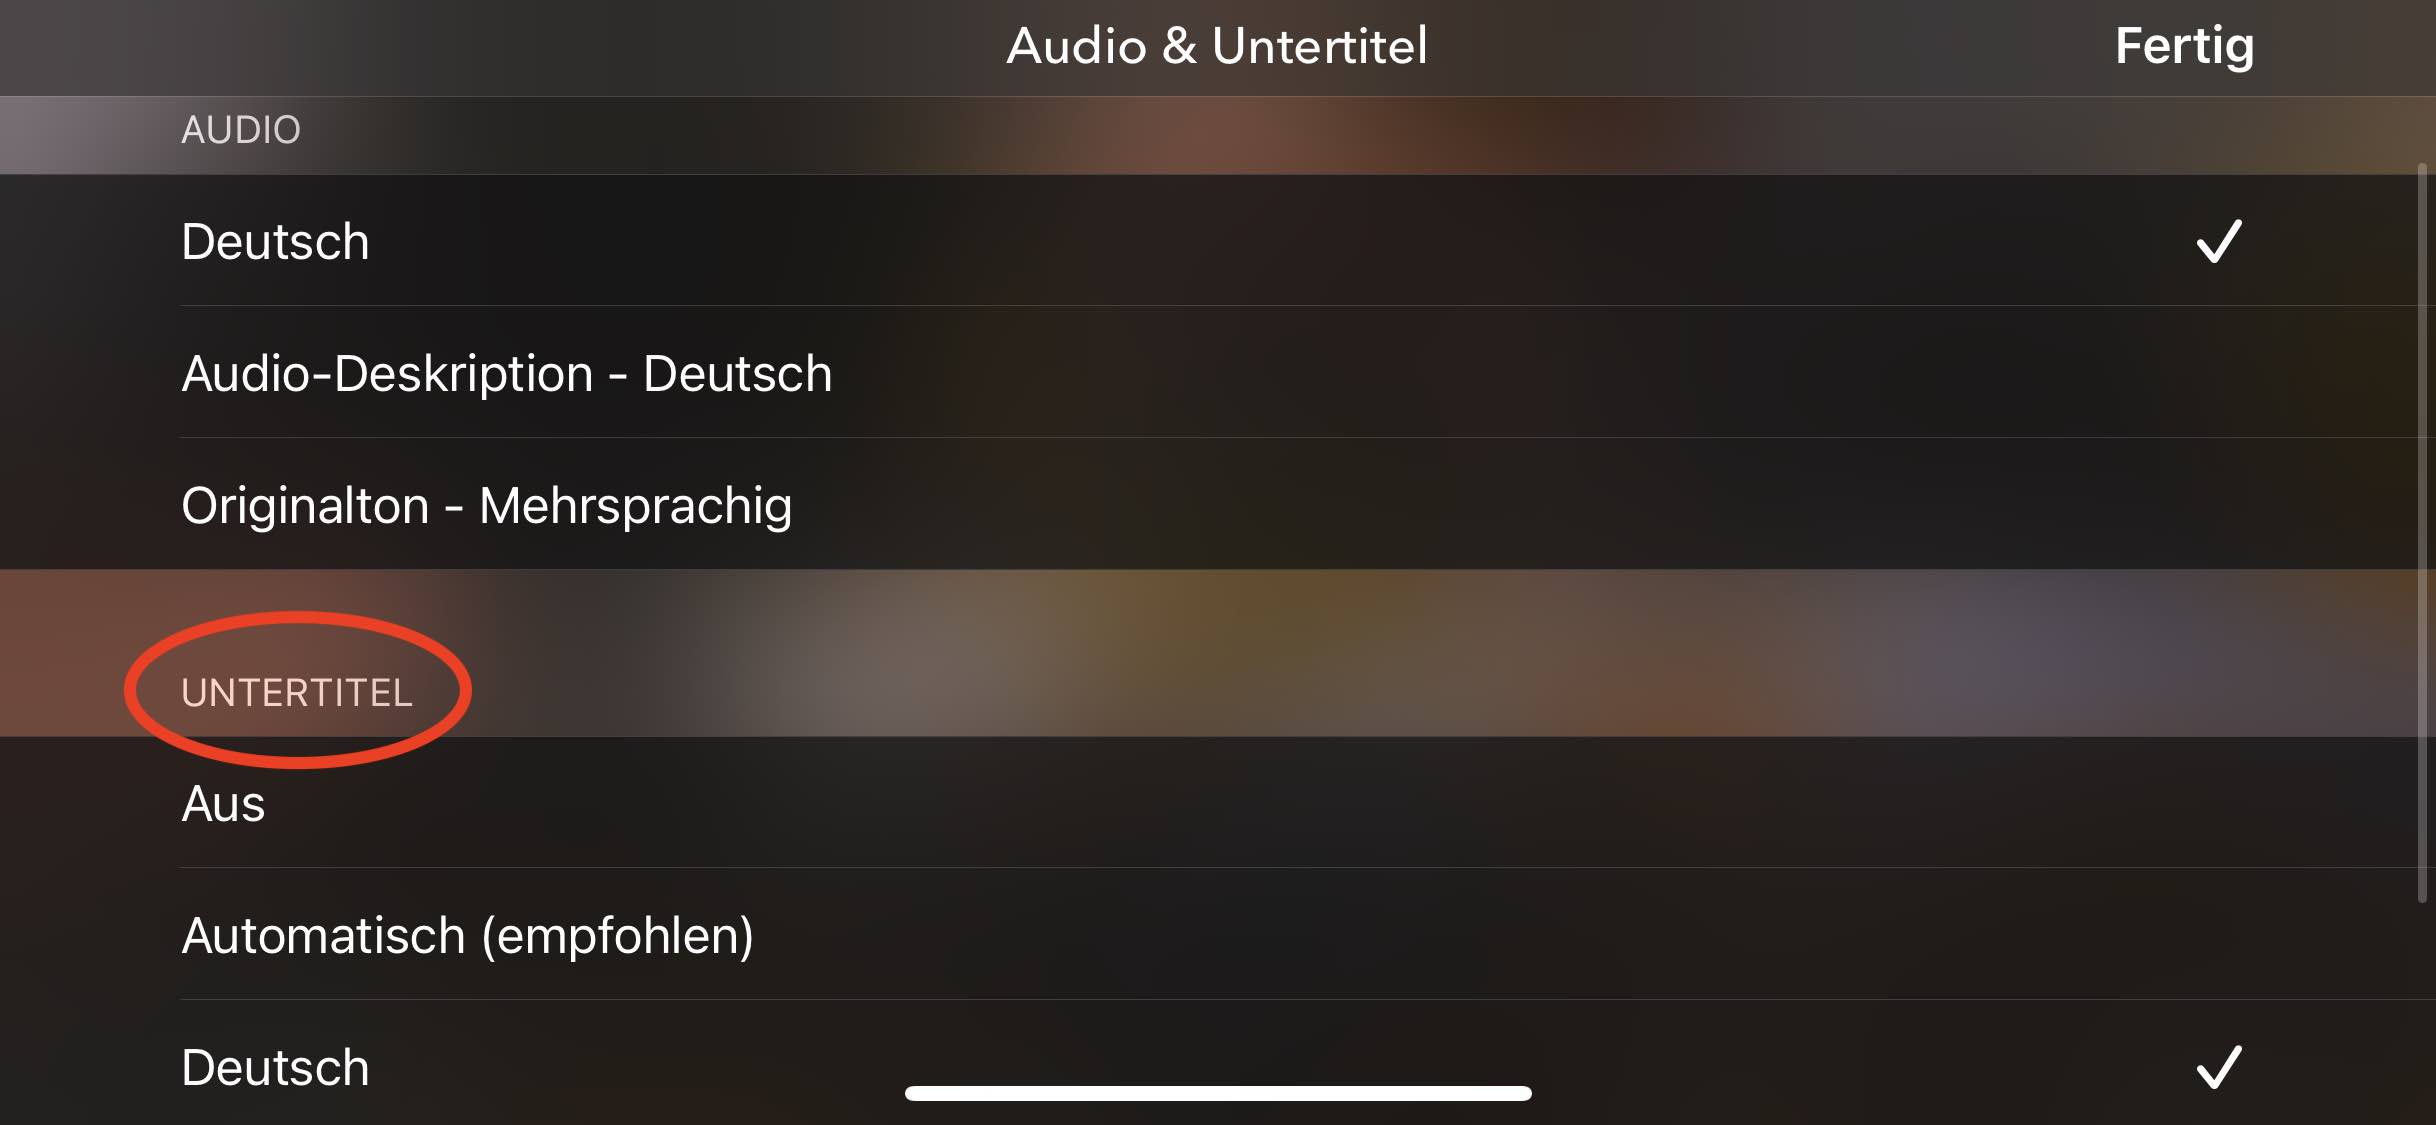
- Open the Google Play Store
- Tap your profile at the top right
- Select Apps & devices > Manage
- Choose the TV Pro app from the list to reinstall it
If settings are not applied correctly in Live TV on Mac, resetting the settings may help.
Here’s how to delete Live TV Mac settings:
- Quit Live TV
- Open Programs > Utilities > Terminal
- Enter the following command
defaults delete de.livetvapp.livetvmacand press Enter
Now Live TV Mac will start “fresh” and settings should be saved correctly. Please note that you may need to log in again with your equinux ID.
Live TV on Apple TV supports Picture-in-Picture playback, meaning you can continue watching your program while, for example, checking something in another app.
If you have switched from Live TV back to the Home screen, you can end Picture-in-Picture playback on Apple TV as follows:
- Press the Apple TV App/Home button on the Siri Remote to display the Picture-in-Picture options menu
- Swipe on the touch surface to switch between the options
- Select "Close" ("X") to end Live TV
This function can also be completely disabled:
- Press the Menu/Back button in Live TV to display the menu bar
- Select Settings
- Disable the 'Automatically enable Picture-in-Picture' option
Smart TVs can be controlled with TV Pro.
You can download from the AppStore.

I purchased a license – how do I get my access back?
If you have already made a purchase, but no account exists with your current email address, you can restore your purchases in the app: Create a new account - If you did not have an account before, create a new account in your TV Pro or Live TV app. Restore purchases - Open the app and navigate to the settings. - Select the “Restore Purchases” option. - Important: This must be done with the Apple ID with which you originally made the purchase. Use the correct app - Make sure you are using the correct version of the app. For example, if you made your purchase via the TV Pro Mediathek iOS app, you must use exactly this app to restore it. Check purchases in Apple ID - If you are unsure with which Apple ID you made the purchase, you can check this in the App Store under: Settings > Apple ID > Subscriptions. - Alternatively, you can check under Purchases in the App Store which apps are linked to your Apple ID.What to do if the restoration does not work?
If you continue to have problems: - Restart the app and try again. - Log out and log back in with your Apple ID in the App Store.You can expand TV Pro Mediathek with "My Mediathek" subscription packages to access the complete Mediathek library. We offer various Mediathek packages and running times.
Packages:
You want another package or another runtime? No problem - this is all in the: App Store Settings
To cancel:
All these products are handled through your AppStore account. There, you can find all running subscriptions under 'Subscriptions' and you can deactivate the automatic extension: Access it here
Further information on renewal
The processing takes place directly via your iTunes account and extends 24h before expiration automatically by the chosen runtime. You can switch the automatic extension up to 24h before an extension at any time in the AppStore in your account settings, ie. An unsubscription becomes effective at the end of the term.
The TV broadcasters decide themselves whether their Mediathek content is available abroad. That is why we cannot give a binding statement on whether a specific show can be played outside of Germany. In practice, the only way to know for sure is to try it.
How to recognize blocked content in the app
To help you quickly identify unavailable shows, the app includes a detection feature: if you see a yellow exclamation mark instead of the Play button, the show cannot be retrieved at the moment.
Try with a German internet address using VPN Tracker World Connect
If you are abroad, it can also help to connect with a German internet address. With VPN Tracker World Connect, you can test whether the Mediathek show is available when using a German IP address. VPN Tracker World Connect can be tested for free for 24 hours:
https://itunes.apple.com/de/app/vpn-tracker-world-connect/id1117424189?mt=8
‣ Go to "Settings" (Einstellungen) > "Welcome screen" (Begrüßungsbild)
‣ Simply select your own picture.
Under TV Pro Classic, the settings are located behind the gear wheel in the lower right corner.
- "TV Pro Gold für iOS" is only valid for iPhone/iPad
- "TV Pro Gold für Mac" is only valid for Macs (Macs mit Apple Chips, ab 2020)
- "TV Pro Gold für Mac & iOS" is valid for Macs (Macs mit Apple Chips, ab 2020) and for iPhone/iPad
- For Apple TV, you can purchase separate packages.
1. Check in which app the purchase was made
Please check in the first step in which TV Pro app you purchased the Gold status. You can find the app name on the purchase receipt.
This is either:
 TV Pro Classic
 TV Programm TV Pro
Alternatively, you can find out in which app you purchased it by checking in the App Store settings under:
App Store > tap your profile picture in the top right > Subscriptions > TV Pro
A package should be selected and active here.
2. Open the app and transfer the Gold status to the TV Pro ID
Please open the app in which you purchased the Gold status in the next step.
- If you purchased Gold in TV Pro Classic, follow these steps:
- 1. Open TV Pro Classic
- 2. Tap the gear in the bottom right
- 3. Select TV Pro Gold
- 4. Log in with your TV Pro ID or create a new TV Pro ID (free) if you don't have one yet
- 5. Tap "Restore Purchases"
- If you purchased Gold in TV Programm TV Pro, follow these steps:
- 1. Open TV Programm TV Pro
- 2. Open Settings
- 3. Tap the first entry: this is usually your name and/or email address or "Not logged in"
- 4. Log in with your TV Pro ID or create a new one if you don't have one
- 5. Tap "Restore Purchases"
Now your Gold status has been saved in your TV Pro ID
3. Restore Gold status on another device or in another app
To transfer your Gold status to your second device or to another version of TV Pro, please follow these steps:
- Open the corresponding app on the target device
- Go to the TV Pro Gold settings as described above and log in with your TV Pro ID
- Tap "Restore Purchases"
- Your TV Pro status should now also appear here
- Delete the Live TV app from the device. (Don't forget to empty the trash on Mac)
- Open the AppStore and download the Live TV app again from the AppStore
Advertising "No-Gos":
- No overlay advertising that you have to "tap away" ("Find the close box")
- No full-screen preroll clips for games and other advertising trash
- No advertising timers ("Banner/video must be viewed for at least 10 seconds until you find the close box")
- No permanent occupation of the screen by advertising
- No combinations/chains of the aforementioned on buttons and functions of the app
We are for:
- Target group-relevant advertising, in the form of hints and banners
- No "flooding" with advertising in the free version
- No "buying" of advertising freedom in the paid version
‣ Visit TV Pro Login.
‣ Click on "Forgot password" there.
‣ Follow the further steps.
► Watch tutorial
http://livetvhq.livetvgmbh.de.
- Delete the currently installed app
- Sign in under Settings > iTunes & App Store with the Apple ID you used to make your subscription
- Now reinstall the app from the App Store
- In the app, in the Store, select the option "Restore Purchases"
In the TV Pro settings (gear icon), tap on the “TV Pro Cloud” section and tap “Delete program data on this device”. TV Pro will now download all program data again.
Exactly for this reason, the price for the combined Mac & iOS Plan is deliberately set lower. It takes into account that there may be a temporary overlap with an existing iOS Classic purchase. You are not paying twice in the classical sense, but benefit from a reduced price for switching to the extended plan.
If you switch to the Mac & iOS Plan, please remember to disable the automatic renewal of your existing Classic Plan in the App Store in good time. This ensures that the Classic Plan does not renew again.
If you have any questions about the switch or the differences between the individual plans, our support team is always happy to help.
Apps on your Apple TV 4 are automatically updated.
You can check if an update for an app is available or if it hasn't been installed yet via the App Store.
Search for the app in the App Store. If you see an "Update" button instead of "Open," you can then manually start the update process.
This link will directly take you to your profile administration:
https://apple.co/2Th4vqI
You will find all running subscriptions under "Subscriptions." You can also disable the automatic extension of your subscriptions.
‣ Create a TV Pro ID in the app and then select "Restore Purchases"
‣ Now open the other apps in the TV Pro GOLD ALL-IN-1 package and enter the same TV Pro ID there.
‣ Logging in with your TV Pro ID will automatically recognize the TV Pro GOLD ALL-IN-1 package.
If you have problems, please delete the app from all devices and start with the device where you initially purchased the TV Pro GOLD ALL-IN-1 package. Then follow the steps above.
- Go to the device's system settings.
- Search for "TV Pro" in the search field at the top.
- Select the TV Pro app
- Activate the "Reset" switch.
- Restart the app
If the Remove button is missing on my.vpntracker.com, the team member most likely still has an Administrator or Manager role. Managers can change roles, manage subscriptions, and invite or remove team members, so your team should always have at least one active Manager.
Before you demote or remove the current admin/Manager, first assign the Manager role to another trusted team member. Otherwise, no one may be able to manage team roles or subscriptions afterwards.
- Sign in to my.vpntracker.com and open your team members.
- Choose another team member who should manage the team going forward and assign them the Manager role.
- Save the change.
- Edit the member you want to remove and change their role to Member.
- Save again, open the member once more, and click Remove.
For a full overview of team role permissions, see What do the different roles in my.vpntracker do?. For a broader walkthrough of team management, see our VPN Tracker Team Setup guide.
Even if the card information has not changed, re-adding the card can trigger a different verification process with your bank or card provider. This may help the renewal payment go through if the previous attempt was incorrectly flagged as fraud.
If the payment still fails after updating the card, please contact your bank to confirm that the transaction is legitimate and that online or subscription payments are allowed for this card.
If you're sure that your time with us is at an end then we've made it nice and easy to remove all your info from our database so that you don't need to wait for us to do it.
Just log in at your Privacy Manager, click 'Delete your Account' near the bottom of the page.
Please note that this action is irreversible and you will loose access to any previously bought products and service!